The Fresh Loaf

A Community of Amateur Bakers and Artisan Bread Enthusiasts.

dabrownman's blog

dabrownman's picture
dabrownman

Isand66 (Ian) has been using a much greater percentage of starter/Levain in his recent SD breads.  As I was looking around for a place to start with this idea, I ran across Chad Robertson's Country SD that uses this same technique.  I also prefer at least 10% rye and WW in the finished loaf and wanted to make sure that was the case in this bread.  I also wanted a higher hydration dough and one that had more AP flour and less bread flour.   This bread sure looks good on the outside but I can't cut into it yet until my wife gives the OK since she is taking it into work tomorrow.  I'm hoping the crumb is fairly open this time - and it was fairly airy.  It was also delicious, especially toasted with butter.  This one is a keeper!

 Chad's Sourdough - Modified - makes 1 large boule

Levain Build - Two days before bake day

  • 82 g starter @ 100% hydration (50% rye and 50% WW)
  • 45 g bread flour
  • 60 g rye flour
  • 60 g WW flour
  • 125 g water

Mix and ferment for 6  hours at 68 F and the refrigerate overnight

Noon -  before bake day

  • 370 g starter @ 75% hydration (all from above)
  • 185 g bread flour
  • 185 AP flour
  • 280 g water
  • 14 g salt

Mix all except salt for 2 minutes on KA 1 and autolyse for 1 hour. Then add salt and mix on KA 3 for 4 minutes.  Move to an oiled bowl and let rest 30 minutes.  Do 10 S&F's in the bowl and let rest 30 minutes.  Do 5 S&F's in theowl and let rest 30 minutes.  Do 1 S&F on a floured bench, return to the oiled bowl and let rest 30 minutes.   Do 1 more S&F on a floured bench and form into a ball, return to the oiled bowl and let rest 1 hour.  Retard dough overnight.    The dough will rise about 10-20% in the fridge.

Remove from fridge and let rest on counter for 1 hour.  Do 1 S&F gently  and do final shape into a boule.  Make sure to tighten the skin properly.  Place in cloth and floured bennaton and let rise in a plastic trash can liner for 2 hours. 

One hour before boule is proofed, heat oven to 500 with stone and steaming apparatus in place.  Remove boule from benetton onto parchment lined peel and put in the oven.  After 2 minutes turn down oven to 450 F .  After 15 minutes total, remove steaming apparatus and bake at 400F convection for  another 15- 25 minutes until the temp hits 205 F in the center of the boule.  Turn off oven and  left bread sit on the stone with the oven door ajar for 10 more minutes.  Remove bread to cooling rack until completely cool.

dabrownman's picture
dabrownman

This fancy French named bread is really a Rustic Country San Francisco Sourdough.  It originally started out as a Glenn Snyder Country SD bread minus the rustic and the sweetbird, that she is,  took the recipe and tweaked it some and came up with the most amazing crust on a bread I have ever seen.   I just had to try my hand at it and converted it further to more my liking by; using a rye sour starter,  grinding my own WW and rye, increasing the rye to equal the WW, reducing the AP accordingly and then adding 50 g of whole WW and rye berries that were boiled in water for 30 minutes and then drained.  The berries were put back into the pot with 1 tsp of olive oil and then sauteed until caramelized.  I was hoping for a bread that would be more rustic, have a deeper more flavorful taste, a deep brown crust and crumb that was soft, moist and still somewhat open.  Well, I think all but the somewhat open crumb was achieved.  I guess you can't have everything.  It is the one of the best textured and tasty breads I have ever eaten.  It, like most breads, is much better toasted with butter and I'm guessing the flavor will be better tomorrow as well.  I can't wait to try this on a new sandwich creation tomorrow.  Here are some pix's.  The recipe follows the pix's

 Rustique Pain Comté de San Francisco

Yield: Two 750g Loaves

Ingredients

Levain Build

86 g AP flour

25 g Whole Wheat flour

25 g Whole rye flour

175 g water, cool (60 F or so)

30 g active culture (72% hydration)


   Final Dough (68% hydration, including levain)

600 g AP flour (77.5%)

87 g whole wheat flour (11.25%)

87 g whole rye flour (11.25%)

440 g warm water (80 F or so) (57%)

14 g pink Himalayan sea salt (1.5%)

313 Levain (40%)

Scald and Caramelize: 50 grams of WW and rye berries boiled in twice as much water as berries by volume for 40 minutes.  Drain berries and return to pan with 1 tsp of olive oil and sauté until the berries caramelize and start to leave color on the bottom of the pan.  When color starts sticking to the pan they are done.

Directions

 1.  Levain : Make the final build 10-12 hours before the final mix.

2. Mix: Add all the ingredients to the mixing bowl, including the levain, but not the salt or the scalded berries. Mix just until the ingredients are incorporated into a shaggy mass. Correct the hydration as necessary. Cover the bowl and let stand for an autolyse phase of 60 minutes. At the end of the autolyse, sprinkle the salt over the surface of the dough, and knead 4 minutes with dough hook on KA 3. The dough should have a medium consistency.  Add the scalded and caramelized  berries and mix on KA 3 for 1 minute   

3. Ferment with S&F: 3 hours. Stretch and fold the dough in the bowl once 10 strokes at the 30minute mark. Stretch and fold again, 5 strokes, at the one hour mark folding it into a ball in lightly oiled bowl.  Leave to ferment 1-2 more hours until the dough is at least 75% larger than when you started the ferment.

4. Retard: do 1 S&F in the lightly oiled bowl forming the dough into a ball again.  Refrigerate 8-20 hours, depending on how much time you have and sour your taste.

5. Divide and Shape:  take dough out of refrigerator and let it come to room temperature about 1 ½ hours.   Divide the dough into what 2 pieces and pre-shape, then shape into boules or batards 20 minutes later.

6. Proof: Approximately 1.5 to 2.5 hours at 72° F. Ready when poke test dictates.

7. Pre-heat: oven to 500 with steam apparatus in place - 45 minutes minimum.  I use a loaf pan half full of water and a dry12”cast iron skillet that go in the bottom rack of the oven at the beginning of pre heat and the stone on the rack above.  When the loaves go in, I throw 1 cup of boiling water into the cast iron skillet right after loading the bread on the stone.

8. Bake:  Slash loaves. Bake with steam, on stone. Turn oven to 450 F when it hits 500 F after loading loaves. Remove steaming apparatus after 15 minutes. Bake for another 15 minutes more or 30 to 35 minutes total. Rotate loaves for evenness as necessary. When done (205 Finternal temp), leave loaves on stone with oven door ajar, oven off for 10 minutes.  Move to cooling rack until loaf is room temperature.


dabrownman's picture
dabrownman

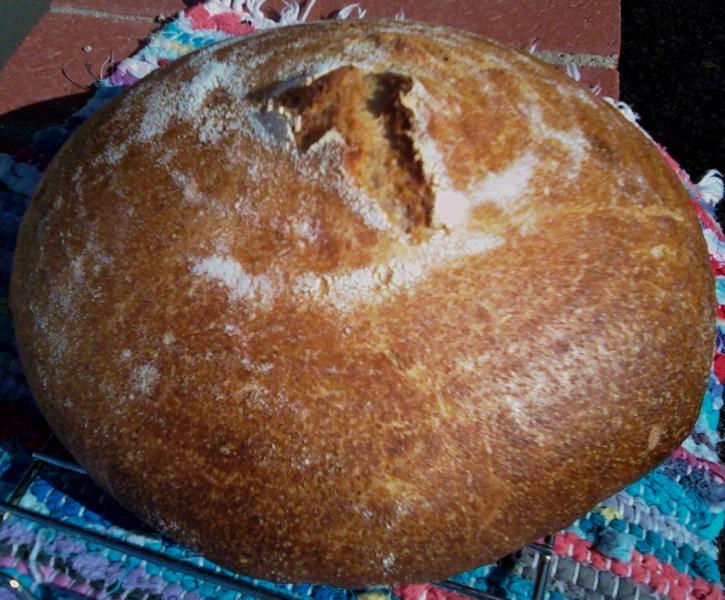
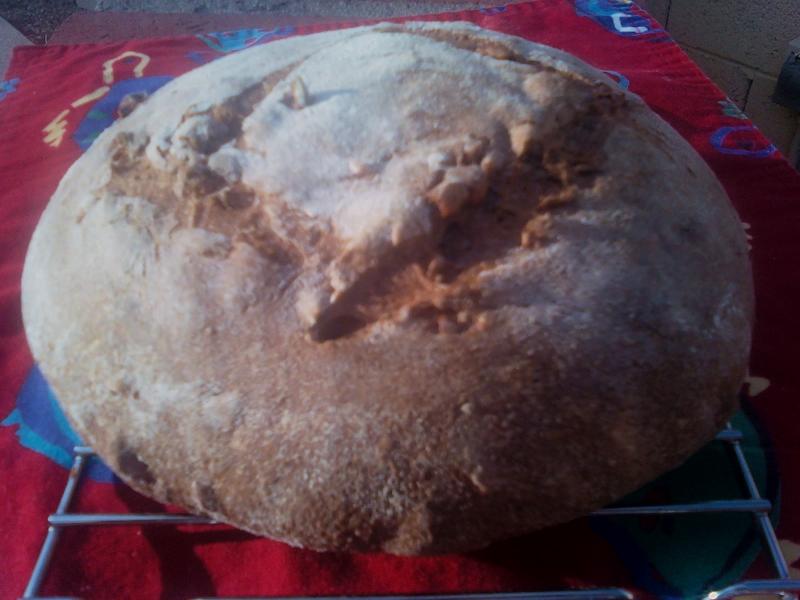
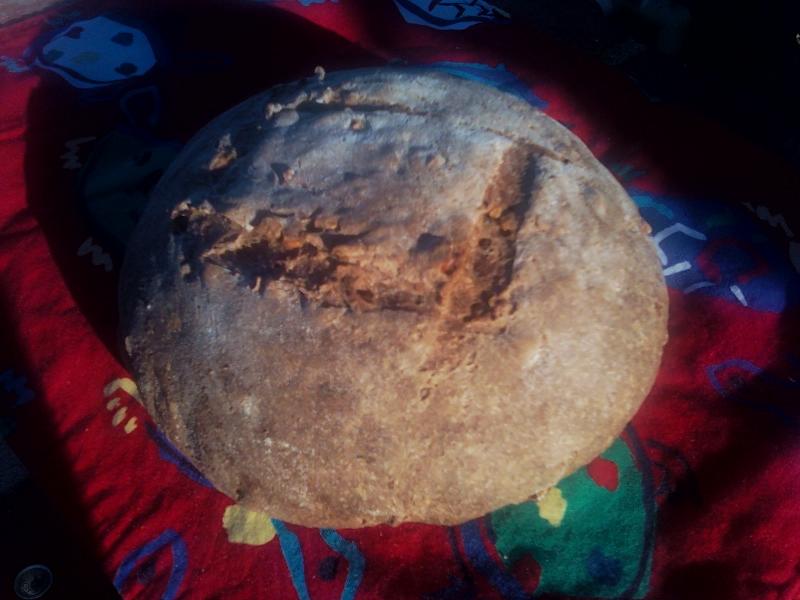
In gratitude for all of her help in my yeast water bread quest, I created a YW bread named for Akiko,  that would be fitting for her graciousness, generosity and skill.  I made this bread today and it is everything I would want in a YW bread if it were to be named after me but, she is the one stuck with it now  :-)  Thanks again to Akiko also known as teketeke at TFL.  A great YW bread named after a great lady.

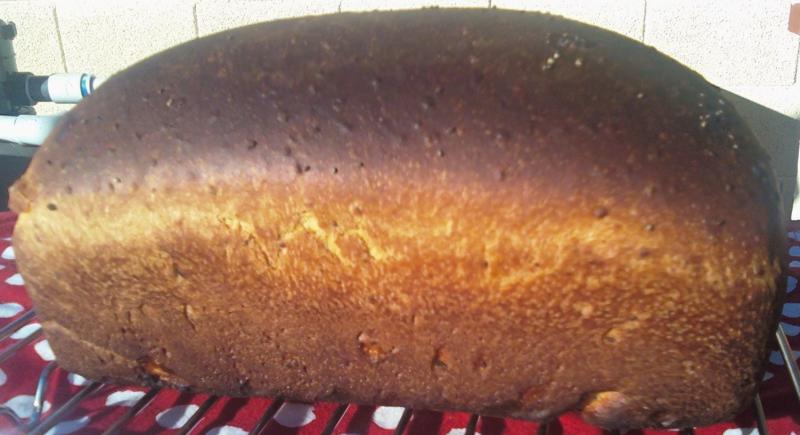
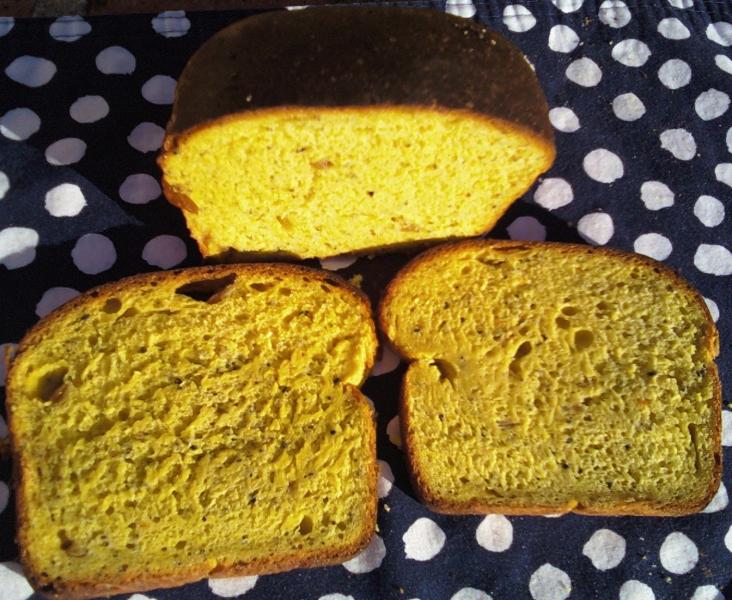
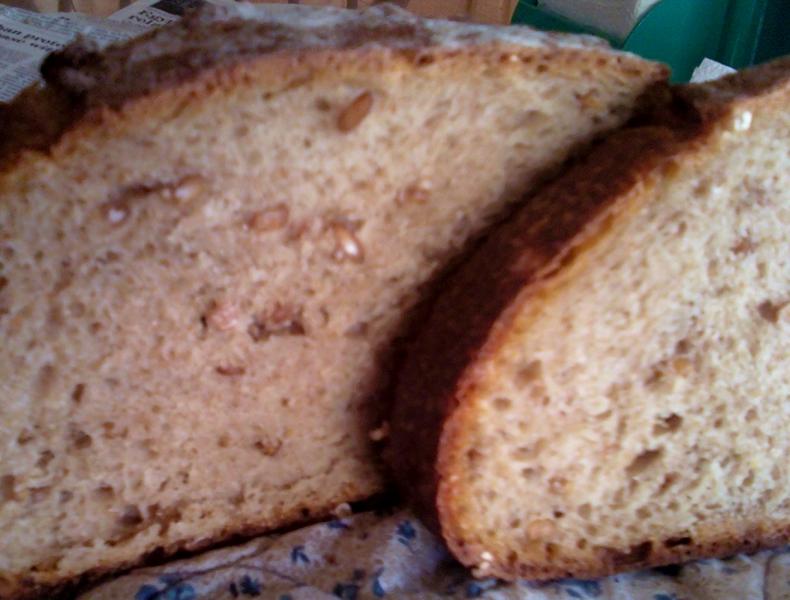
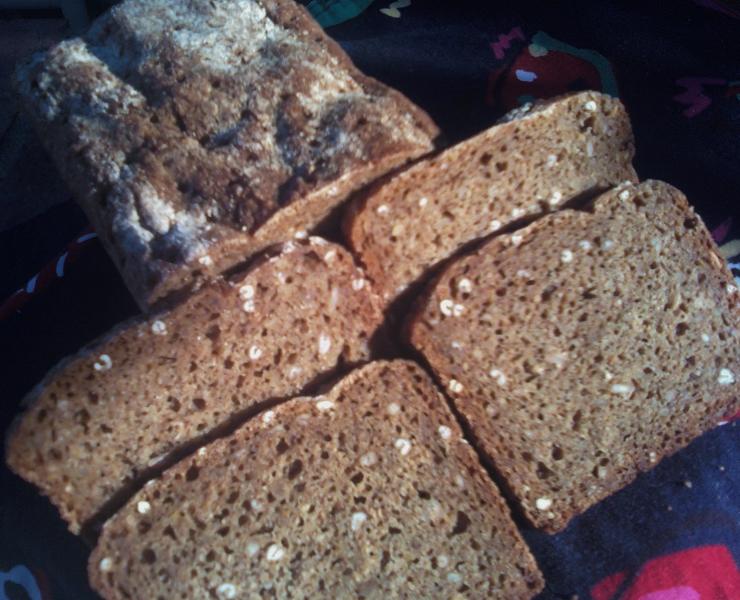
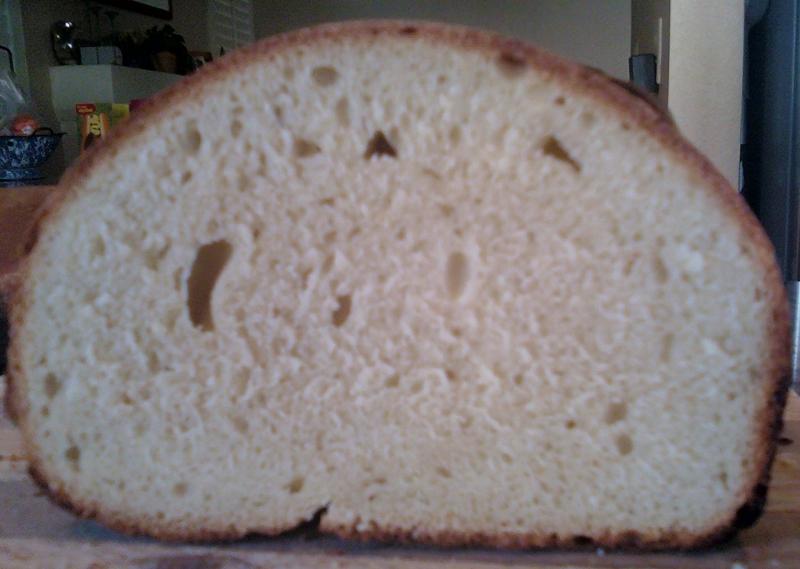
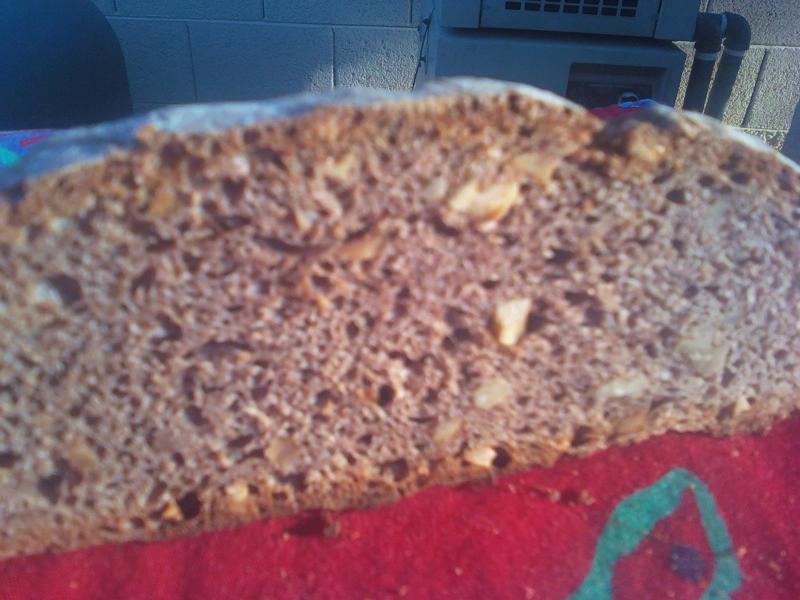
teketeke Bread - Japanese White Whole Wheat, Orange, Apple, Turmeric, Seeded YW Bread

 Levain:

 KA bread flour - 75g

KA White WW flour – 75g

Yeast water 115g

 Total levain build 265g – at 80 F

 First build - 25g of both flours and 50g yeast water.   Second build 4 hours later - 25g each flour and 65g YW.  Third build 25g of both flours = stiff levain.  Let sit 4 more hours.

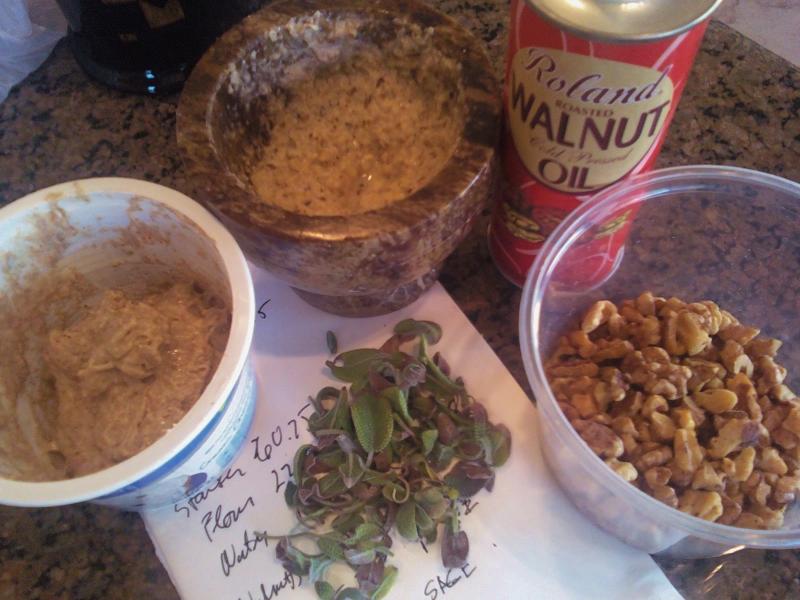
 I use Mandarin, Minneola Apple Yeast Water 2 days after refreshing from the refrigerator and reserve the apple and orange solids for the bread.

 Final Dough

 KA bread flour - 200g

KA White Whole Wheat - 100g

Water - 75g

Orange Juice - 80g

Egg yolk - 1

Whipping Cream - 60g

Sugar - 6g

Honey -6 g

Butter - 29g

Salt - 6g

2 tsp each Nigella, chia and basil seeds (hanseata’s contribution)

¼ tsp turmeric – for color

Apple and orange solids, patted dry with paper towel,  from the previous YW refresh 2 days before levain build began.

The entire levain

 Method:

 Make the levain - for 12 hours at80 F

 In stand mixer - mix the final ingredients, except the salt and reserved YW solids, with paddle at #2 - Autolyze for 30 minutes.

 Add the salt-- knead with dough hook starting on #2 and moving to #3 and #4  until the gluten develops to window pane stage for about 8-10 minutes.  Flatten, do S& F while incorporating the reserved YW solids into the dough.  Shape into ball and transfer to an oiled bowel and cover with oiled plastic wrap.

 Bulk ferment: 3 hours at 80 –82 Funtil the dough at least doubles.  Do one S &F at 30 and another at 60 minutes.

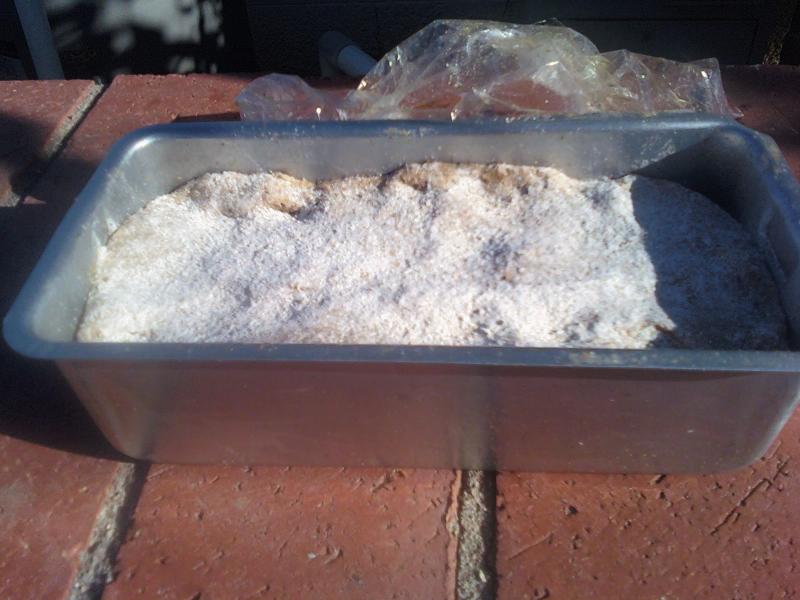
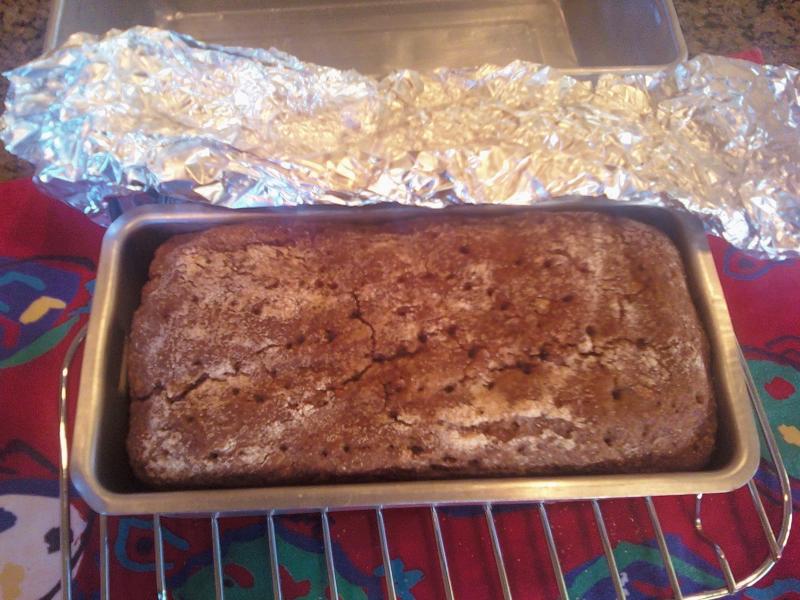
 Pre-shape fermented dough into ball and let rest 10 minutes.  Shape into loaf and place in oil sprayed 4 ½ x 8 ½ x 3 Pyrex loaf pan.  Cover pan with oiled plastic wrap.

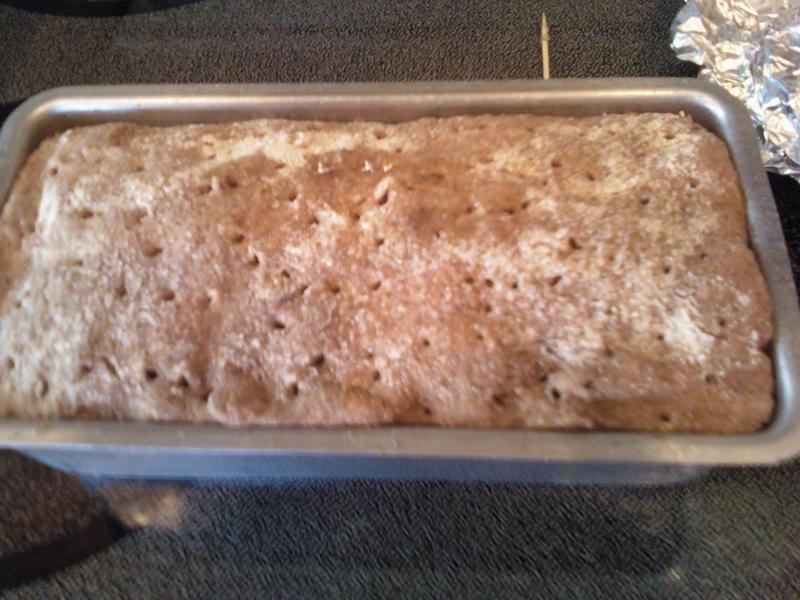
 Proof:  2-6 hours at82 Funtil the dough at least rises up to the top of the pan.

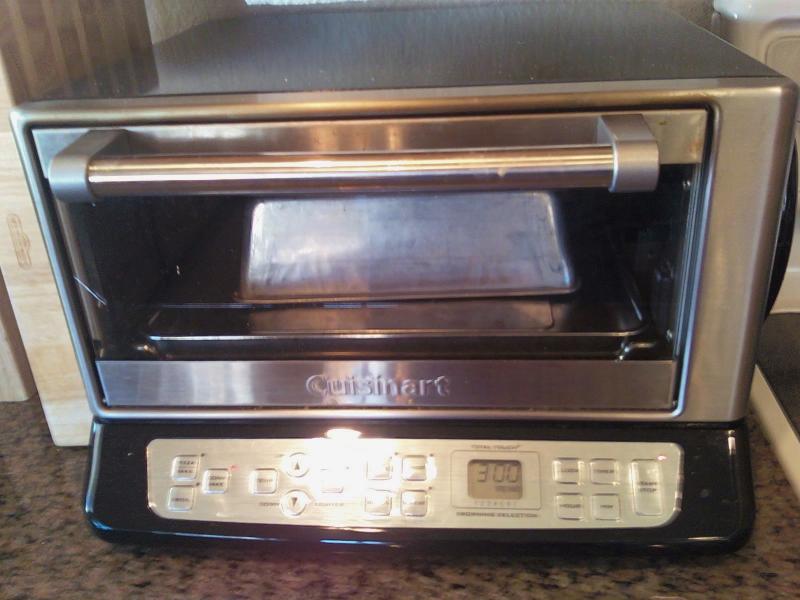
 Preheat oven to450Fwith a loaf pan half filled with water and a12”cast iron skillet in the bottom of the oven and a stone on the next rack level above for 45 minutes.

 Decrease temperature to400F, throw a ½ cup of water into the cast iron skillet place bread into oven and bake for 12 minutes.

 Take out steaming apparatus, rotate loaf 180 degrees and bake for another 12 minutes.

 Place probe into the middle of the nearly finished loaf from the side and bake until the loaf hits205 Fturning 180 degrees every 4 minutes.  The loaf should be done in 28 minutes or so.  Turn off oven, take loaf out of pan, crack oven door open, place loaf back on stone and let the loaf sit in oven for 10 minutes more to crisp the crust.

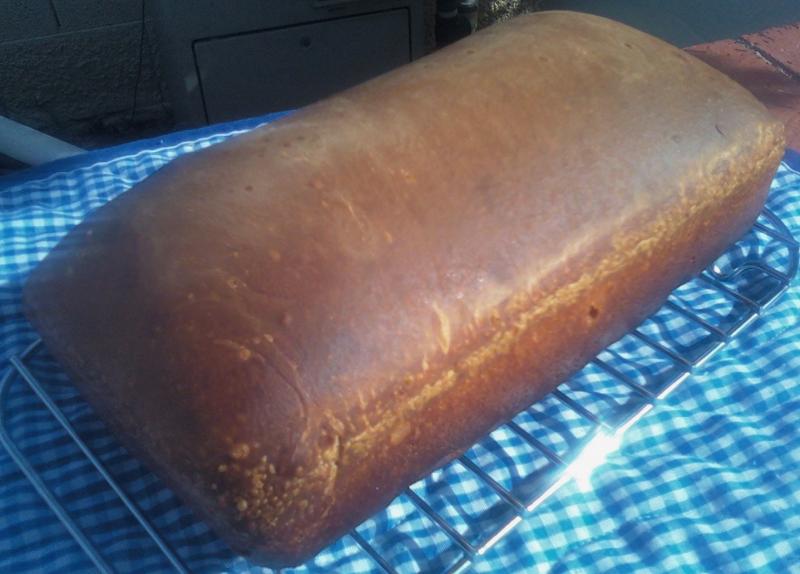
 Remove loaf from oven and let cool to room temperature, about one hour, on a wire rack.


dabrownman's picture
dabrownman

I pretty much followed Phil's post, except my pan was 4 x 2 3/8 x 8 and much smaller in height, so I baked it less time at 2 higher temp and added a lower setting that Phil didnlt use.  I did 45 min at 375 F, 45 min at 300 F and 30 min at 225 F. When I checked the middle of this small loaf was 210 F so I called it done and let it sit in the oven with door ajar oven off for 10 minutes.  205 F would have been a better internal temperature for sure but you can't get everything you want.  It smelled great right out of the oven, not as dark as Phil's due in part to to my rye berries not being very dark ones at all.

When it rose and inch in 30 min starting at the 2 hour mark of final proofing and started to crack, like Phil said it would as a signal to bake it off, I put it in the oven.  I did wait 2 days to cut and try a slice as Phil recommended, but I'm sure 1 day wouldn't make that much difference would it?.  The crust was firm but not hard.  The loaf was easy to cut in 1/4" slices - no worry.  The crumb was actually airy with small holes throughout.  It was also soft yet still chewy, moist and just plain delicious.  Buttered and lightly toasted was also exactly what i expected.  After marketing, selling and delivering Rubschlager Rye Breads for 20 years, I have a taste for fine rye breads and this one reminds me of Rubschlager Rye Breads only more rustic and chewy.  It also looks more rustic than Phil's crumb too.  Maybe I had a larger granules in the soak and scald? It is a keeper for sure.

Here is a lonk to Rubschlager   http://www.rubschlagerbaking.com/

I am very happy with Phil's Rye as a first try at a 100% rye (if you discount the spelt) for me - thanks for all of your help Phil and Jay (longhorn). It was really not bad at all as long as you are ready and can handle the wetter mass of the dough.  I just floured up my hands and board and shaped on it, plopped it in the oil sprayed pan seam side down and smoothed out the top.  I am glad I was only doing small loaf :-)   Since no high temps required I baked it in my mini oven on a sheet pan, with a larger loaf pan over the top of the aluminum foil covered smaller pan that had the bread in it.  When I bake this again I am going to double the baking time and reduce the heat even further following Phil's advise again.  I think I might try one of Andy's rye breads next if I can find one not too difficult.  Here are some pix's.


dabrownman's picture
dabrownman

As Jennifer Paterson famously said 'This bread is not your slimy old white slice' - Well, this isn't either.  I followed Akiko's recipe almost to a tee except I used my mandarin, minneola, apple yeast water instead of raisin yeast water.  I was forced into a 7 hour retard and I baked the loaf at 400 F w/ convection because that is what my Cuisinart Mini Oven does ( only 25 degree increments in temperature) and there was no reason to use a big oven.  I only baked it for 30 minutes, turned off the oven and cracked the door when the loaf hit 205 F and let it sit inside the oven to crisp up the skin.  This is the same oven I used for Phil's Vollkornbrot yesterday - talk about some serious dark to light whiplash :-)  teketeke's (Akiko's) recipe can be found here:

http://www.thefreshloaf.com/node/22482/japanese-white-sandwich-loaf-raisin-yeast-water

Akiko has been most generous and helpful in getting me started with yeast water breads.  Some day, when I learn to slash better than my current 'double y chicken foot' signature slash, I will try out her baggies she makes from yeast water.  There is no question in my mind that YW is far superior to regular yeast when it coms to breads where sour is not need or wanted.

This Japanese bread has to be the king of white sandwich breads.  It sprang well over 100% in the oven even though we figured out my pan way too big compared to what Akiko uses.  It has the most luxurious, creamy crumb so moist, soft and delectable.  Just perfect.  The crust is deeply browned, crackly, bubbly, crunchy and crisp.  The taste is about as good as any white bread can ever hope to be - and that is saying something.  I can think of 20 ways this dough can be used, other than as a sandwich loaf.

If you don't use YW - you should try it even if just for fun.  It will brighten your bread horizons and its varieties and qualities can't be matched.  The next bread in mind, where some of the water is replaced with orange juice like Shiao-Ping did with her Orange Turmeric SD bread - that I also baked off with yeast water instead of SD.  Orange zest seems in order here too.  I hope those aromas get transferred to this new variation of Japanese White Bread.   But, Akiko just might beat me to it which will be fine and dandy :-)

And today I had it for lunch as a Hispanic spiced grilled chicken sandwich.


dabrownman's picture
dabrownman

I am glad to say that I have made 3 of David's fine SD concoctions in the last month.  Each one better than the last.  I started with San Joaquin and learned from some on TFL that this was their 2nd favorite of David's breads - Pugleisi being the first.  Then I did his current quest of SFSD.  I thought this bread was every bit as good as San Joaquin but I did change it slightly to get some of my favorite flour in it.  I just had to do his Capriccioso but also wanted to add in some of my favorite WW and Rye flavor  at 50 g each replacing some of the AP and, since I didn't have enough AP, I subbed 100 g of KA unbleached bread flour.  Other than that I kept his recipe intact including the water even though I was adding in some thirstier grains.

I was drawn to this bread because it is baked upside down with the seam side up on the stone and it is seam side down it the proofing basket - in this case a flowered kitchen towel inside a pretty Mexican basket.  This is very nice bread to bake with no long retard involved and it just came out perfect - at least as good as I can do right now - not for David of course.  It tasted great, the crust and crumb were to my liking and it was much better the next day.  this is now one of top 5 breads on a list of at least 10 in the top 5.  Thanks David.


dabrownman's picture
dabrownman

Today is my wife's birthday.  Who wouldn't want a chocolate crusted orange flavored cheese cake with an orange flavored; chocolate ganache, truffles and chocolate shavings for toppings?  Home made aranchello makes this a special birthday cake.

dabrownman's picture
dabrownman

Many folks are putting cheese in theitr bread.  Why?  Because all bread including Cheese Bread tastes good.  Especially, if you put bacon in it.  Fresh cheese making is easy, way easier than making bread.  Here is how.

Fresh Cheese

 Ingredients

 4 cups whole milk

1/4 C vinegar or juice from a lemon or ¼ C of yogurt or 1tsp of citric acid dissolved in water (what I normally use.).

 Directions

 Bring the milk to a boil in a large pot. Add the vinegar, and stir until the mixture separates into solids and liquid. Drain the mixture through cheesecloth set in a large mesh sieve over a bowl.  Rinse with clean water while in sieve to get rid of the vinegar.  Wrap the ends of the cheesecloth around the curd and put a heavy weight on it such as a cookie jar, rice container or huge #10 Hominy can like I do..

 Place the mixture in the refrigerator. Let the water drain completely for at least one hour, or overnight for a firmer fresh cheese.

Remove the fresh cheese from the cheesecloth, and use the fresh immediately, or refrigerate in a covered container for up to 5 days

Optional Additional – after 1 day draining in refrigerator

Leave in cheese cloth and soak in 6% salt water solution for 24 hours.  Remove from cheesecloth and lightly salt the surface of the cheese.  Wrap in parchment paper and let age in refrigerator for 60 days lightly salting every 7 days for the first 21 days.

 WARNING -  Be very careful here as you are now into hazardous to your health mode if you don’t know what you are doing…… and make a mistake that can – and will kill you and anyone else that eats your mistake


dabrownman's picture
dabrownman

I didn't want to cut into it. Not then. I thought that there might be something purple or green or both inside. It could easily have been a purple people eater or even something much, much worse. I had to wait until the morning light - didn't want to be crippled by darkness if it was something horrible ........and emerged very hungry. I would have needed every advantage to escape if it had attacked. I contained it in a brown paper bag so it stayed nice and comfy, unperturbed...... and had no reason to attack anyone ......until it was too late......and the bread knife struck when it was least expected. Sleep well my friends in bread. We dealt with this purple menace on the morrow.  We lived through the night.

The brown bag containment field worked overnight I am pleased to say and once under the bread knife, it was purple after all!!! The cell phone camera just doesn't do it justice. This is one handsome round of bread and the smell is unique but nice as well. Even when using the home ground whole meal wheat berries, the crumb is not dense, but slightly open, soft and moist too. The home grown sage comes through well and the walnuts, which I thought would be too many and too much, are also very tasty and in balance. What a great concoction Phil has pulled from his Hulking bag of tricks!  Have had it plain, toasted and with goat cheese this morning and it just grows on you subtely. Before you know it - its nearly gone - but I did freeze half of it. I cut your formula in half and got a small round. It didn't spring as much as I thought it would in the cast iron enameled pot I used but I think the pot was too big and I should have used a smaller one. It did rise well in the basket during final proof. I did let it go 1 and 3/4 hours instead of the 1 hour in Phils formula until it passed the poke test. This is a sophisticated, fined and elegant yet rustic kind of bread that is in a new class - the purple one.....a bread that people want to eat. Very nice indeed Phil.

dabrownman's picture
dabrownman

I take my standard Banana Nut Bread recipe and add, bourbon soaked dried fruits (cranberry, sultana,raisin, apricot) and chocolate chips.  The cupcake is topped with cream cheese icing, shaved chocolate and a half a strawberry in the shape of a heart.

Very romantic, sweet and delicious for the ones you love.


Pages

Subscribe to RSS - dabrownman's blog