The Fresh Loaf

A Community of Amateur Bakers and Artisan Bread Enthusiasts.

ananda's blog

ananda's picture
ananda


Caraway Rye Bread.

This is a favourite with my wife, and one I want to truly perfect in the next few months, for "Competition Bread" purposes.   It works as follows: 75% Strong White flour, and 25% Dark Rye in the form of a 15 hour sourdough culture.   Black strap molasses and caraway seeds for flavour; overall, just shy of 65% hydration.

Formulae, method and photographs shown below:

Rye Sourdough Refreshment and Final Dough for 2 large "Miche-style" loaves

Materials, etc.

Formula [% of flour] 

Recipes in Grams

1.First Refreshment: 11.02.2010. 20:30


Ferment, ambient for 24 hours [approx 18 - 20°C]

Leaven from stock [wheat: 100 flour, 60 water]

Flour: 7

Water:4.4

50

Flour31, water19

Dark Rye

23

100

Water

34.8

150

TOTAL@ 31°C

69.2

300g

2.Second Refreshment: 12.02.2010. 20:30


Ferment, ambient for 15 hours [approx 22°C]

Leaven from above

69.2

300

Dark Rye

70

300

Water

116

500

TOTAL @ 31°C

255.2

1100


[Flour 100, Water 155.2]

[Flour 431, Water 669]

3.Final Dough: 13.02.2010. start mixing 11:30, finish 12:20


Rye Sour [from above]

64 [flour 25, water 39]

855 [flour 333, water 522]

Strong White Flour

75

1000

Salt

1.8

24

Caraway Seeds

1.8

24

Black Strap Molasses

8

107

Water @ 40°C

25.8

344

TOTAL

176.4

2354

Notes:

Pre-fermented flour [all rye] 25%


Overall hydration 64.8%


Method:

  • Follow the refreshment timetable to create an active culture
  • My kitchen was cool this morning [13°C], and flour and sour very similar [sour actually 18] Addition of cold syrupy molasses, so the water I used was bath temperature; even then the final dough was only 21°C. This is fine, although I would have liked 25; end result 2 hour bulk instead of 1½ hours. Anyway, you end up with a very sticky mass, so here is how to combine materials relatively pain-free. Weigh the hot water, and dissolve the molasses into this. Add this to the sour, and add the salt and caraway seeds. Mix together til blended. Add the white flour and loosely mix. Autolyse 30 minutes. Mix on the bench top, and between the hands in front of you [Andrew Whitley's "Air Kneading"; Breadmatters, 2006]. The Rye and Molasses make it sticky, but the strong flour means it will mix into a strong and developed dough, so persevere. Do not add any flour; that goes without saying, of course!
  • Brush the bowl sparingly with olive oil, and store the dough, covered with plastic sheet for bulk proof in a warm environment. I do this on the hearth, just below and in front of our trusty wood-burning stove.
  • Stretch and fold twice, after 40 minute intervals; see photos.
  • After 2 hours bulk proof, scale and divide and mould. Set to final proof in bannetons, in similar conditions to bulk time.
  • Pre-heat the oven for up to 2 hours to store heat in the bricks. Add boiling water to the roasting pan of hot stones at the oven base, to create steam. Tip the first dough piece onto a pre-heated tray, cut diamond-shapes across the whole crust surface, and place on top of the hot bricks to bake.
  • Turn down the heat on the oven to 200°C after 15 minutes, and slide the dough directly onto the bricks. Use the hot tray to cover the roasting dish and thus prevent further steam formation in the oven chamber. I baked the first loaf [1290g weight] for 45 minutes, and the second loaf took 35 minutes [just over 1050g]
  • Cool on wires.

Photographs , in sequence, are attached below, but no video, as these were made at home.

I also made some Ciabatta with "00" flour, a wheat levain and super-hydration of 85%.   More details to follow; apologies for not quite capturing the full quality of this finished bread.   It is quite superb in terms of flavour.

Best wishes

Andy


ananda's picture
ananda

I have been working with Mary and Nigel for about 18 months now, providing Consultancy services to help them get their cherished bakery project off the ground.

I first met these dedicated Francophiles when they attended the Breadmatters Masterclass in early Summer 2007.   We discussed their project to establish a genuine local bakery in their adopted village of Wye in Kent.   The High Street has a load of potential, and, eventually they came back to me to say they had bought premises and the project was moving.   Alison, my wife, and I went to Kent over the Bank Holiday of 2008, giving me some time to experiment with Mary and Nigel using the specialist type 65 flour they had sourced from one of their many trips made to France.   We made some fantastic Pain de Campagne.

I should add that Mary had worked in Brussels, whilst Nigel had been involved in Aid and Development work in Africa, having lived in New York for sometime, based at the UN.   I put this blog together, because there are some excellent discussions to be found on the site at the moment in relation to flour combinations which people like to use.   A lot seem to centre on creating a flour mix which equates to the French ash content, aiming for somewhere near to Type 65, or, maybe 80.

On my second visit, Mary and Nigel had done the ground work and were preparing to start production in their lovely new bakery.   It had been far from plain sailing, as the project was based in the relatively modern extension built on the back of a High Street building which was an integral part of the village conservation area.   They had a new spiral mixer, and an upright mixer which was wired to continental standards, and gave me a scary electric shock early on.   They also had a sparkly new 3 deck oven and some big peels!

As you may imagine, creating a top baguette was a high priority.   The same with croissant.   Mary and Nigel had just returned from a week long intensive craft baking course with the French Baking Institute.   They were itching to turn their knowledge, and new skills to creating perfect specimens.   Well, I think we did well, and I know Mary and Nigel were very happy with the progress we made that Bank Holiday weekend.   Perfect baguettes and croissants, no!   But so much progress.   Lots of photos attached for you all to see.

These good people opened for trade very soon after.   They are now working flat out, and doing really well.   I heard about queues reaching out onto the High Street.   Committed to the cause of real bread, and dedicated to the entrenched passion and tradition of French baking, I am sure they will succeed and prosper.

Best wishes to all, especially those friends in Kent!

Andy

ps.   I originally had it in mind to try and show what was so different about dough made with real French flour.   I don't know how successful I have been.   I'm not that dedicated to the French cause, myself, and like to make a whole range of different breads from different flours, but I thought these photos do give a reasonable indication of what French flour gives, in terms of both dough, and finished product.   There were some really special qualities to what we achieved in such a small amount of time.


ananda's picture
ananda

Hi,

I thought some detail on creating laminated dough for croissants etc may be a popular subject.


CROISSANT DOUGH


MATERIAL

FORMULA

[AS % OF FLOUR]

RECIPE

[GRAMMES]

RECIPE [GRAMMES]

Strong White Flour

100

600

1000

Salt

1.3

8

13

Milk Powder

5

30

50

Fresh Yeast

6

36

60

Cold Water

63

378

630

SUB-TOTAL

175.3

1052

1753

Butter

41.7

250

417

TOTAL

217

1302

2170

Method:

  • Mix the ingredients for the dough to form cool, developed dough.
  • Put in a plastic bag in the chiller and rest for 30 minutes. Cut the butter into 4mm thick strips and put back in the chiller.
  • Roll the dough out to a rectangle 8mm thick. Put the butter pieces flat onto 2/3 of the rectangle, and fold as below:


  • Turn the dough piece clockwise through 90°. Roll out to the same size as before, fold as above, and turn. Repeat once more.
  • Chill the billet for half an hour and give 2 more folds and half turns as described. This gives 168 layers of butter in the croissant dough. Chill again for half an hour.
  • Roll the dough piece out to 5mm and use a croissant cutter to cut out triangle shapes. Stack into piles of 6 and rest covered for 2-3 minutes.   You can use a template made from wood, or, cardboard, to cut out the individual triangle shapes instead.   Please see the video, at 1 min 35secs, for a brief view of the croissant cutter on the left of the screen.
  • Tease out each triangle, fold up the top edge and roll up tightly. Roll out the feet to pointed ends and move round so these feet join up to make the classic shape.   See Vicki demonstrating this in the pictuure below.   For Pain au Chocolat and Pain Amande, cut the dough into strips, 6 x 10 cm; cover with small chocolate chips, or a thin layer of almond paste, and roll up so the seam is well pressed down on the bottom.
  • Place on silicone lined baking sheets and brush with beaten egg.   For the pain amande, dip in flaked almonds
  • Prove at 38-40°C, 80%rH for 40 minutes.

Bake in a hot oven, 235°C for 12-15 minutes; a deck oven should be set at 7 for top heat, and 5 for bottom.   No steam is used, and a damper is not needed.

[Almond Paste to make Pain Amande]

150g Icing Sugar, 150g Caster Sugar, 300g Ground Almonds, 50g Egg, beaten, 1 tbsp Lemon Juice


Key Principles of successful laminated dough:

  • 1. The dough should not be too wet. If the dough is soft, it will stick to the bench and the pin, and the laminations will quickly be ruined. If the dough is too tight, it will be difficult to roll out without the dough insisting on springing back. Some have advised that the dough need not, therefore, be fully-mixed. This is because all the rolling and folding will continue the dough development. My own thought on the matter is that the dough should be developed to the level allowed by the choice of flour used. So if a top grade flour is used, the dough should be mixed accordingly. If the flour is not so strong, it will not tolerate intensive mixing anyway; by hand, or, machine.
  • 2. The best way to deal with dough which springs back is to allow extra resting time. Allowing plenty rest between turns is the first key principle to grasp. If you compare the folding process to working out bicep muscles in the gym, you should not go far wrong. Bicep curls would be repeated to the point where the muscle is so tensed up it cannot do any more. After a period of rest the same moves are repeated. The moves are designed to strengthen the muscle by continued work. But there has to be rest in between to allow the muscles to relax. It is exactly the same for the gluten-based protein fraction in the dough.
  • 3. The other key principle is to be able to work cold. It is generally cold and raining here in the UK, but I am aware many who write on this site have problems creating cool enough conditions in the kitchen to lessen the burden of making these items; I wish I lived where it was warm too, don't you believe it! Here are a few options:
  • Use a chilled marble slab, or, a refrigerated work surface.
  • Use crushed ice in the dough, or chill the dough water for an extended period prior to dough mixing.
  • A good trick is to chill the dough overnight. Give the dough 3 half turns, then bag and chill overnight. Waken up early the next morning, give the dough its last half turn and process from there. Bake off the croissants and serve straightaway for breakfast. You have just made yourself soooo popular with everyone in the house, forever!
  • 4. What about the choice of laminating fat? Commercial croissants tend to be made with specialised and plasticised fats. This means the final product tends to be just a lot of air! Worse still if the fat is cheap, the melting point will be high, and the product will stick in the roof of the mouth [palate cling] These fats are not exactly renowned for their health-giving properties, either. So they are used on cost and performance grounds. As far as I am concerned croissants are made with all-butter. It is possible to buy a concentrated butter commercially. This is great, because all the water has been removed, so it means the butter block can be rolled out to a sheet, without it melting. Household dairy butter has a water content of 15-20%, so the problem with not working cold, is that the butter can easily start to melt, meaning the death of all the laminations you have worked so hard to achieve. So, performance-wise, butter is not the best, but for flavour, it obviously has no competition. I'm pretty sure concentrated butter is only available commercially; this is definitely the case for the UK and rest of the EU too.
  • 5. Regarding lamination; due care and skill is the 3rd principle. I teach that croissant are given 4 half turns. Danish are often given only 3. Full puff paste employs equal laminating fat to flour used in the dough. This is usually given 6 half turns. The more turns, the more layers created. Above I state 4 turns gives 168 layers. Another 2 half turns works out as follows

168 x 3 = 504   504 x 3 = 1512.   So many layers is incredibly difficult to achieve.   Yet, to commercial bakers it is essential.   The number of layers dictates the amount of "lift" in the product, giving greater volume to weight ratio!   This affects product yield; well-aerated puff paste yield more products.   Given these doughs use expensive ingredients, a baker cannot afford to miss out on achieving correct product yield.

  • 6. In terms of volume and lift, it is important to explain how this works with yeasted doughs like these. When the product goes into the oven, the fat layers melt into the dough layers beneath, creating cavities between the dough layers. These cavities are filled with steam from the water content of both butter and dough. The steam exerts pressure on the dough layer above, causing the product to expand. See diagram below. So, it follows that the more layers, the greater the pastry will rise. So, what of the yeast? Well, the benefit is in terms of a first fermentation for sure, but it has to be achieved in cold conditions, as we have noted. This should mean the yeasts are far from worked through when the croissants are set to prove. Note the yeast level is relatively high. Any benefit has to be derived from rapid expansion as the croissants hit the hot oven. So, testing the dough for evidence that fermentation is slowing down is not a relevant test. We have no need for any sort of complex fermentation at this stage.

7. Lastly, oven treatment tends to be incredibly forgiving to croissants , so long as the oven is hot enough. Although, I think I'd be hedging my bets with items that were becoming tired and spent, in line with the notes just above.   My practical classes last anywhere between 3 and 5 hours.   3 hours is really not very long to make these items with skill from start to finish; and the resting between turns really can be so crucial here.   But I cannot think of a single class I have facilitated on this product where the students have been anything other than delighted by the tasks they have carried out, and the products they have made. It's the colour, and aroma; these items just look and smell great when they are baked. Fabulous!

 See the photos attached below, and the link to the video below that.


Here's the video:

ananda's picture
ananda


Hi,

I have moved this over from a discussion on Shiao-Ping's blog  to my Blog, as I was getting lost in some of the detail being covered, and because Shiao-Ping had asked me for more detailed discussion of sour doughs within My Blog page; so, here goes:

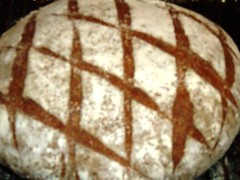
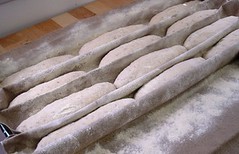
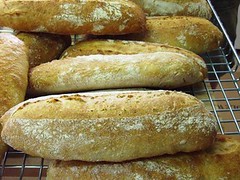
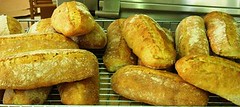
I am detailing below the feeding regimes we used to make thousands of Pain de Campagne and Rossisky loaves everyday in the bakery where I worked from 1994 to 2003.

Feeding regimes:   Commercially one feed works fine

e.g. French Leaven was refreshed from 41kg to 130g every 8 hours.   We had 3 bins this size, enough to make 6 x 120kg of dough for pain de campagne, with 3 sets of 41kg of leaven left for refreshment, which would take place 4 to 5 hours later, given our leaven fermented in 3-4 hours.

FRENCH LEAVEN REFRESHMENT

Material

FORMULA % of flour

RECIPE [kg]

French Leaven [from stock]

73.21

41

Strong White Flour

82.15

46

Wholemeal

17.85

10

Water

58.93

33

TOTAL

232.14

130


 Occasionally we had to let a batch of leaven go really sour, or, add some rye sour into the leaven as we worked the leaven so hard that the acid content had fallen way down; a rare problem indeed for the home baker, I suggest?

Shiao-Ping, thank you for your most recent reply making reference to LeFleur, Kamir and Leader.   How ironic indeed that our French leaven as discussed above needing an injection of acid bacteria, whereas LeFleur and Rubaud both reject the premise.   I happen to think it really depends on how you look after/mistreat the leaven in its non-production phase.   Commercially, this phase is very short, but for the home baker that will not be the case, unless a constant refreshment regime is applied, and a considerable amount of regenerated leaven will then have to be thrown out as waste.   Don't you think the magic of maintaining a living culture to raise all your bread over a long time period is some really special concept?   Unless I was thinking my levain had genuinely gone bad, I'm with Hamelman all the way; but if the base is "off", it has to be thrown out, and a new leaven created in its place.

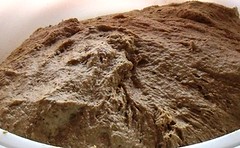
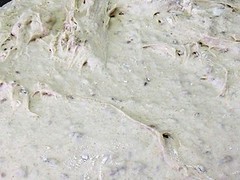
1 bin of Rye sour comprised 18kg of flour and 33kg water, and just 2kg of original sour; on flour basis this means 670g of fermented flour being used to ferment 18kg of flour [i.e. 3.72%]!!!!   After 2 hours the fermenting rye mass would be bubbling up at the top of the bin.   When we used the sour after 18 hours it would have dropped right back and the colour changed from the grey of dark rye to a pinkish brown tone with an obvious creamy texture, and the residue of a thin yeast crust on the top.

RYE SOUR REFRESHMENT

Material

Formula [% of flour]

Recipe [kg]

Rye Sour [from stock]

11.1

2

Dark Rye Flour

100

18

Water

183.33

33

TOTAL


53


For the home baker life has to be a bit more complicated in that most bakers will use a mother which is retarded in the fridge between baking sessions.   That said, when it comes to refreshment for baking, I build enough leaven to have some left over which will then go back in the fridge ready to make the next leaven.   I do not keep a pot of degenerating rank sour in the fridge, as that just becomes an acid bath in which no wild yeasts can survive.   If you do this it will take an aeon and a fantastically complicated feeding regime to bring the leaven back to a suitable state to make good bread.   To this end, I agree wholeheartedly with Shiao-Ping on leaven storage.   The mention of German bakers using  sour for flavour purposes only, maybe needs the additional reminder that commercial yeast will then be added to the final dough to counter  the inability of the wild yeasts to prosper in the high acidic environment.   Only keep a small amount of stock, and make sure to keep it relatively fresh.   Yes, it is possible to bring very old leaven back to life and make bread relatively quickly; but I would argue that bread would be poor in quality.   A small amount of relatively decent leaven can be fed carefully to produce a fully balanced culture which will yield the BEST bread; this is what we strive for.


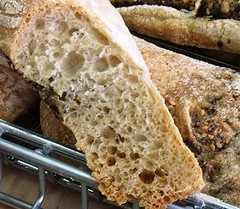
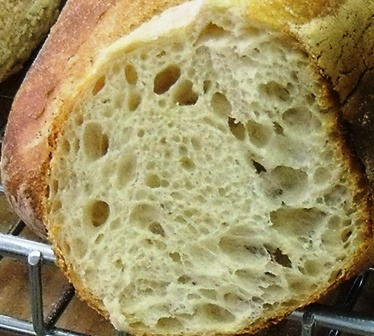
When all's said and done the state of the leaven needs to reflect your own palate in terms of the eating qualities of your bread.   A leaven made with just one refreshment of a chilled pot of acid will give sour bread.   A leaven which is "green" will produce bland and low volume bread, as the yeas activity has not kicked in properly, and insufficient time has elapsed for a build up of any lactic or acetic acid


Please read what Jeffrey Hamelman says in his section on "Detmolder" [pp200] of "Bread: A Baker's Book of..."   It gives real context to the need to create the necessary balance of acids and wild yeast.   Other than that most other references are academe.   They are of great interest and make very challenging reading, but with reward.   I think Shiao-Ping would agree with me that the work of Debra Wink on this site is by far and away the best starting point for digging deeply into this complex area.


I'm still trying to make sense of a comment made by Hansjoakim concerning high acid concentration and low pH.   For Hans, wild yeasts don't like high acid concentrations but don't mind low pH.   To me, the wild yeasts are just as sensitive to acid concentration as lactobacillus, if not, even more so!   Shiao-Ping is under the impression that a low pH indicates high acid concentration; that these are one and the same thing.   I would totally concur with this.   Saacharomyces Cerevisiae [Baker's Yeast] does not like acid conditions at all, so plays a very limited role in this type of baking.   There are a number of other yeast strains which can tolerate more acidic conditions, but I would suggest that is still over 5 on the pH scale.   Working with pH is incredibly interesting; we did some experimentation whilst I was at College, but it would require tremendous dedication to the cause to do it in a home baking context.


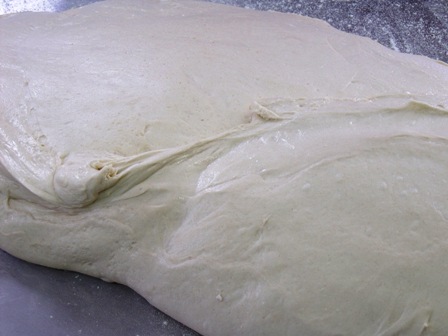
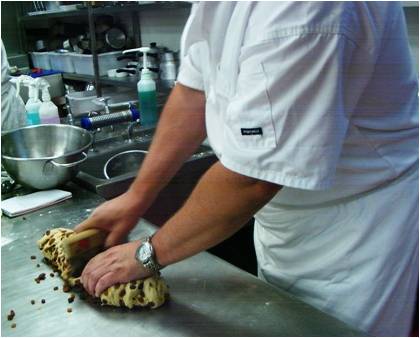
On that note Shiao-Ping is bang on the money in her discussion of "balance".   Yes, a feeding regime can be just a guideline; but it will only work in this way when the baker understands what is needed from the leaven and how to create the conditions that will deliver that.   The reference to rhythm is all important.   A long-time baking colleague and friend of mine once wrote a small passage explaining how we used to hand knead all our dough in the small bakery he and I set up and ran over 20 years ago.   He came up with the monumental phrase "be the dough".    In that sense the dough really is what you put into it, in terms of energy, and on many different levels!!


Hansjoakim makes reference to high ash content/extraction rate in flour.   This definitely impacts on fermentation.   I have more direct experience of this with regard to the more conventional bulk fermentation systems.   Wholemeal and brown doughs will not tolerate long fermentation in the same way that white flour doughs would.   I think this is the real basis to the French ash content system.   In the UK we don't really have anything industrially to compare with the Type 65, and 80.   I suspect the American way to deal with this is the same as we do in the UK.   That is to add in a portion of wholegrain flour to conventional white bread making flour.   This may be either strong wholemeal flour, or a dark, or, medium rye flour, or a combination of both.   I notice a lot of folks on here use "AP" flour.   We have "Plain Flour" as the nearest equivalent, but I would not look to use that myself; it is designed for home bakers making pastry and cake.

My favoured alternative to the wonderful all-Canadian strong white flour I have sourced is from the following places.   There are some wonderful local farmers/millers who produce an equivalent of this ash content, and it is great to make bread from these organic and sustainably produced strains.   For all that, our climate in the UK is rubbish, as many of you will no doubt know.   A local miller who has supported me by coming in to lecture to my students grows single strain rare breed organic wheat on his own farm, milled at his own brand new, but traditional, stone grinding mill just 3 miles away from the farm.   His flour has quite a high protein content, and it can be used to make great bread, through long fermentation.   For all that the gluten quality is, to me, very low in comparison to the strong flours derived from Canadian and North American climates.   That has to be expected and accepted when taking the decision to use these flours.   The English climate is what it is, and these wheats have been grown in a non-intensive and environmentally sensitive way.


Best wishes

Andy

ananda's picture
ananda

A while ago Debra Wink asked for information on English Muffins.

I attach details below, mostly from a Practical Class with my Foundation Degree students from last academic year.

The attached video is from very early days, and was prepared entirely by the students.   You can hear me advising other students in the background; that's how I know I wasn't directly involved.

Recipe specifications are attached [many thanks to my baking mentor and tutor during my time studying for my bakery qualifications for letting me have a commercial recipe specification to use], and I will dig out some photos and attach manufacturing instructions below.

Here goes:


CRUMPETS


Material

Formula [% of flour]

Recipe [grammes]

Strong Flour

100

500

Salt

2

10

Yeast

6

30

Water

110

550

TOTAL

218

1090

Bicarbonate of Soda

0.3

1.5

Cold Water

28

140

TOTAL

246.3

1231.5


Yields 20

Set plate to Mk4. and pre-heat.   The temperature of the hot-plate should be just below 200*C


Method:


  • Sieve together the flour and salt.
  • Dissolve the yeast in tempered water [30°C]
  • Combine these 2 in a mixer and beat on first speed for 2 minutes to form a batter
  • Beat on second speed for 6 minutes
  • Cover the batter and keep warm for 1 hour bulk fermentation
  • Dissolve the bicarb in the cold water and mix this solution well through the batter.
  • Use immediately, piping the mix into lightly-greased hoops, ready-placed onto the prepared griddle surface.   Hot-plate should be clean and un-greased


English Muffins


Material

Formula [% of flour]

Recipe [grammes]

1. Sponge


Strong Flour

50

750

Water

30

450

Yeast

0.5

7.5

TOTAL

80.5

1207.5

2. Final Dough


Sponge

80.5

1207.5

Strong Flour

50

750

Salt

2

30

Milk Powder

8

120

Yeast

8

120

Butter

10

150

Water

30

450

TOTAL

188.5

2827.5

makes 40 muffins @ 65g

This is based on Rose Levy Barenbaum's recipe if I'm not mistaken; one of my Foundation Degree students was very keen to learn how to make these, so we did the developmental work together, and he had a go at making them; quite successfully I believe.

We made the sponge on an overnight basis.   This would mean the sponge would be cool, so final dough water would need to be tempered accordingly to achieve a DDT of around 30*C.   I would refer you to Walter T. Banfield's text "Manna; A Comprehensive Treatise on Bread Manufacture." London: Maclaren. 1947, which states one essential to success as warming the flour.   Elizabeth David's English Bread and Yeast Cookery has some useful comments made over the years on English muffins too.

It is strange how we ended up basing our recipe on the work of a modern day American author, rather than on the works discussed above.   I am pretty sure it is because we wanted to use a pre-ferment to make these, and all the recipes I came across used bulk fermentation.   From my own studying time 6 years ago, working for my bakery quals, we definitely made these with a ferment.   Given that my FdA students were working on complex fermentation methods, I specifically asked for English Muffins made using an Overnight sponge.   this is what we came up with.

The dough should be soft, although hydration in the formula does not look alarmingly high.   But, given you have plate-work, be wary of the dough being too soft; if this is the case, you will end up with crumpets, as shown in the first recipe.   These are made from a batter which is piped onto the griddle: see video.

It is just a case of combining the sponge with all other ingredients and mixing to form a soft, warmish, and well-developed dough.   I am aware American flours generally have a higher level of hydration, but please note the flour I used in this formula is strong, and one of the best commercial specs available over here.   It is milled from 100% Strong Canadian Wheat.

Debra Wink indicated wanting to experiment with Wholegrain.   I am sure this would work well, although I have only ever come across these goods made with all-white flour.   The essence of the product is to have a soft and chewy "breadcake" like texture, where the dough rises substantially on the plate thanks to conduction.   That is why we wanted to use a pre-ferment rather than a bulk-fermented straight dough.   So, wholegrain flour: yes with the following provisos:   the wholemeal would need to be strong, and finely milled.   A brown flour, say of 85% extract would be excellent.   Do not go above 50% brown flour in the flour "grist".   The water content will need to be adjusted upwards to take account of extra absorption from the bran.   Obviously, the formula can be adapted to use milk rather than the water/milk powder combination.

The dough should have a resting time of upto 30 minutes, then scale and divide, and mould each piece round.   Dust the bench with rice cones, flatten slightly and rest the dough pieces on the rice dust, covered, for 45 minutes to an hour.   Cook in batches on the griddle; they should take about 10 minutes, being flipped over half way through cooking.   The gritty rice cones on the outside of the muffin are a wonderful contrast to the soft and chewy centre.   The dough should rise slowly on the griddle as the muffin cooks; that was why we sought to use a pre-ferment in the formula.


Here's the video:


Best wishes

Andy


ananda's picture
ananda

Welcome to my second blog.

I have posted some details below regarding production of English Hot Cross Buns.


HOT CROSS BUNS

Makes: a, 45 buns @ 65g each; b, 12 buns @ 80g each

Material

Formula

[% of flour]

Recipe a

[grams]

Recipe b

[grams]

1. FERMENT


Strong White Bread Flour

30

300

100

Caster Sugar

5

50

17

Fresh Yeast

8

80

27

Water @ 38°C

45

450

150

TOTAL

88

880

294

2. FINAL DOUGH


Ferment [from above]

88

880

294

Strong White Bread Flour

70

700

234

Salt

1

10

3

Milk Powder

8

80

27

Butter

20

200

67

Egg

20

200

67

Caster Sugar

20

200

67

Cinnamon

1

10

3

Nutmeg

1

10

3

Sultanas

33

330

110

Raisins

17

170

57

Mixed Peel

17

170

57

TOTAL

296

2960

989

3. CROSSING PASTE


Soft Flour


150


Shortening


35


Water


200


4. STOCK SYRUP


Caster Sugar


150


Water


150


Oven Profile: Deck oven; 190°C for 10 - 12 minutes top heat 5, bottom heat 5.   Dampers are closed, no steam used.


Method:


  • In a large bowl, and crumble and dissolve the yeast into the warm water, then  whisk in the sugar and flour to form a batter.   Cover with cling film and set aside in a warm place for half an hour.
  • In the meantime, prepare baking sheets lined with silicone paper and weigh up all materials, ready to be mixed as follows:
  • Weigh the dried fruit into a separate container.
  • Weigh all the other ingredients for the final dough directly into the mixing bowl.   You need to use the strong flour to ensure the high liquid content is taken up.
  • Attach a dough hook, add the ferment to the mixing bowl contents, and mix for 2 minutes on slow speed to form a soft dough.   Scrape down the bowl to ensure all materials come together in the mixer.
  • Turn the mixer onto a higher speed; no more than 3rd speed should be necessary, and mix for 8 minutes to form a smooth, elastic and soft dough.   This dough is very soft, so care is needed to ensure thorough scraping of the sides of the bowl.   Mixing should result in the soft dough eventually pulling away from the bowl to allow the hook to do the development work needed.   It is quite difficult to mix this dough by hand, but a Kenwood Mixer, or a Kitchen Aid should do the job providing the scraping down is thorough.
  • Take the dough off the mixer and store in a bowl lined with a little shortening to condition the dough.   Allow up to half an hour for this.
  • Place the dough on the bench, spread it out and pile the fruit on top of the dough.   Fold the dough over the fruit to encase it.   Then, take a scotch cutter and cut the fruit into the dough until it is very evenly distributed [see attached photo; this is an excellent way to add fruit without damaging either the fruit pieces, or the strength of the dough].
  • Scale the dough off into 65g pieces, and mould each piece round.
  • Place the dough pieces close together on a baking sheet so they will kiss, and batch together when they bake [6 x 3 on the baking sheets normally used].   Brush with a little milk if you like, or beaten egg for extra colour.   The glaze at this stage will particularly help if you have no enclosed prover.
  • Set to prove for 40 - 50 minutes at 38°C, 85%rH, in a prover.
  • Meanwhile make the crossing paste by crumbing the fat with the flour, then whisking this with the water to form a smooth paste [AP will be fine].   Empty the contents into a disposable piping bag with a very small hole cut in the end.   Pipe up and down, then across back and forth to form crosses on the top of the buns [see attached photo, and the accompanying video link].
  • Bake to the specifications above, as soon as the crosses have been piped on.   Domestic oven should be set at 195°C [170°C for the ferocious fan oven type]
  • As the buns bake, dissolve the sugar in the water to make the stock syrup.   Bring this to the boil in a pan and remove from the heat.
  • Brush the baked buns with the hot syrup as soon as they come out of the oven [see attached photo].

Empty the buns, as a batch, from the trays, and cool on wires


Here is a video demonstration of how to pipe the crosses onto the buns prior to baking.


ananda's picture
ananda

Hi!

This is my first ever attempt at a blog.   I have been a member of the Fresh Loaf just over a couple of weeks; that's all.

By way of introduction, I am from the UK, and I lecture in Bakery in Newcastle upon Tyne, in the North of England.   I have industrial experience as a craft and artisan baker going back to 1987.   I gained distinction in my bakery qualifications in 2005, and then went on to gain full teaching qualifications as well.   Currently I am studying for a Masters Degree in Food Policy.

I planned to post a series of blogs using content and materials I share with my students in college.   I have tried to pick recipes which will be of interest; if anyone has a particular request, please let me know.

First  Product is......  

CHOLLAH

[Plaited Festive Bread]

Method: FERMENT AND DOUGH 

MATERIAL

% OF FLOUR

GRAMS

GRAMS

1. FERMENT


Strong White Bread Flour

20

100

400

Water @ 38°C

32

160

640

Fresh Yeast

8

40

160

Sugar

5

25

100

TOTAL

65

325

1300

2.FINAL DOUGH


Ferment

65

325

1300

Strong White Bread Flour

80

400

1600

Milk Powder

5

25

100

Salt

1

5

20

Sugar

5

25

100

Butter

10

50

200

Eggs

28

140

560

TOTAL

194

970

3880


Oven profile: bake in the deck oven at 175°C, top heat 6, bottom heat 5 for 28 minutes.   No steam, draw the damper for the last 5 minutes 

Method: 

  • Whisk all the ingredients for the ferment together in a steel bowl.
  • Cover with cling film and set in a warm place for half an hour.
  • Mix all the ingredients, together with the ferment, in an upright machine with a hook; 2 minutes on first speed, then scrape down; 6 minutes on 3rd speed. A spiral mixer is a good alternative.
  • Rest, covered, for 15 minutes, then scale into 970g pieces and divide each into 2, 3, 4, 5, 6, 7, or 8 equal sized pieces, depending on the number of strands in your plait. Try to avoid using any flour on the bench during this and subsequent stages.
  • Mould round, cover and rest 5 minutes.
  • Line trays with silicone paper. Roll out strands to 9" and plait according to instructions.
  • Double brush with beaten egg. Top with poppy seeds. Set to prove.
  • Prove 50 - 60 minutes at 35 - 40°C, 85%rH.
  • Bake as oven profile.
  • Cool on wires.


This is a video demonstration I used with my students to assemble an 8 strand plait:


Pages

Subscribe to RSS - ananda's blog