The Fresh Loaf

A Community of Amateur Bakers and Artisan Bread Enthusiasts.

JonJ's blog

JonJ's picture
JonJ

This bread ticks a whole bunch of health check-boxes for me and my ravenous teenager who is into healthy eating - whole grain, not wheat, and lots of fibre from seeds.

Foodgeek (Sune Trudslev) has a great description of this recipe with a matching video. He even has some fun suggestions of toppings you can use to make open sandwiches (smørrebrød) including, of course, smoked eel.

The high amount of seeds in this bread (90%) are what make it so special, bringing in some flavour, and a lot of chew and fibre. I prefer to use pumpkin seeds and rye kernels as per the original recipe, but practically it is not always possible to have enough seeds on hand and for this bake I'd run out so used a mix of seeds from the cupboard; this bread is still delicious with whatever is available.


There are variations of Danish rye, for example, this Stanley Ginsberg Danish rye recipe seems to only have about 20% in seeds, and possibly a more sour taste to it.
I take care when making this bread to keep the rye sponge fairly 'sweet' and I like to give it a final build 3-5 hours before using it in the final dough for this reason. The levain was made over 3 builds to achieve the 166% hydration sponge. Build 1 was 5g sweet stiff wheat starter:50g dark rye flour:50g water. Build 2 was the above:160g dark rye:160g water. Build 3 was the above:125g dark rye:344g water and 540g of this was used in the final dough when it was 3 hours old. Of course, there are lots of ways to make the levain and two alternatives are offered with the original recipe.

Sune's instructions for knowing when to bake is when the bread has risen 30-50% in the pan and there are 6-7 pinhead sized holes on top. I'd tend to agree with that, although for this bake the rye flour was super active and had reached the top of the pans after only 3 hours with many pinholes; consequently they were baked a little earlier than was usual and had some minor cracking on the top but otherwise I think the fermentation was spot on.

And, for this bake, inspired by Lance I tried painting on flour paste and starch washes to get some "glanz" on these breads, which sort of worked, they looked prettier than normal but I doubt you'd notice it unless you were looking carefully.

Besides the open sandwiches, this bread is great toasted and with a lot of butter. The Dane's have a special word for the tooth marks you leave behind when the butter is super thick, it is tandsmør ("tooth butter").
These breads are sweet and dense with a highly satisfying mouth feel, and I highly recommend this recipe if you love 100% rye or not.


JonJ's picture
JonJ

When I'm in the mood nothing beats a fresh chewy bagel and for me this can be one of the most satisfying breakfast or lunch breads. I know some people aren't so into bagels, but I just think that (maybe) they've never had a great boiled bagel that came out of the oven a few minutes ago.

So, I bake a lot of bagels and thought it might be good to write a bit about my preferred recipe here. First a disclaimer - it isn't really mine - it is mostly Jeffrey Hamelman's "Bagels with Pâte Fermentée" recipe!

Where I make it differently is that I think using a regular hydration (100%) unsalted sourdough starter plus a little wholemeal flour brings with it a lovely flavour and freshness, and that this makes for a great replacement for the pâte fermentée from the original recipe.

Dough then becomes:
   
    690g bread flour
    76g  wholemeal flour
    200g levain (100% hydration, made with bread flour, usually from overnight ferment)
    397g water at around 30°C
    18g  salt
    1 3/4 teaspoons instant yeast
    1 1/4 teaspoons diastatic malt powder

Also, instead of sprinkling the baking sheet with semolina or cornmeal as Jeffrey does, what works well for me is a quick spritz of water and a sprinkling of brown rice flour which makes it easier to pick up the bagels for the boil. I've also figured out that I like bagels with a slightly shorter bake - so about 15 minutes at 230°C for the nice chew and softness.

This hybrid version, and Jeffrey's original pâte fermentée, are such lovely go-to recipes for bagels.

JonJ's picture
JonJ

A few years ago, Dan Ayo posted here about his experience with using chocolate malted barley from the brew shop in a bread. It made a big difference to the colour of the bread and the flavour of it too.

Thinking the same, I made small taste testers using three different kinds of barley malt that I picked up from a craft brew supply store.

The malts that were tried were called: BEST chocolate malt, BEST caramel Munich I, BEST biscuit malt. I assume, from the names that the original source is Bestmalz.de. You can see the theme that all of the names of the malt promised a different flavour experience, although that would be with beer!

Taste testers in this case were seven different doughs each made with a base formula of 100g white bread flour, 65g water, 20g levain and 2g salt. I tried two different concentrations of each malt - 2% and 0.5%, and made a seventh dough with no malt in it for taste comparison. Credit is due to Paul for the idea of the 100g sample loaf.

In this pic you can see the testers after baking. In columns, from left to right, they are: chocolate, caramel, biscuit. The top row is at 0.5%; the bottom row at 2%. And the lone one on the far right had no malt added to it.Called the whole family to taste and we had a pleasant time sniffing and tasting each sample. As you can see the chocolate malt one was quite visually distinct, even at 0.5% but especially at 2%. It had a taste like 'coffee' and not chocolate. The other two didn't bring in enough flavour to notice, but they did improve the dough and bread texture, especially the biscuit malt. If you sniffed them very carefully you could pick up some interesting malt notes even with the pale malts.

In conclusion I'd say that the chocolate malt was worth the try and can see why Dan found it interesting too. There are many other interesting malts used by brewers that I'd like to play with as well, obviously there are rye and wheat malts, but also curious to know if anyone has opinions on whether things like an acidulated malt or a malt with high dextrins that might have an effect on the Maillard reaction would be a worth a try. And then there is the approach of including the grains themselves in the bread which might be a better way to go.

JonJ's picture
JonJ

If you think about it, the spicing used in falafels (cumin & coriander, garlic, cardamom...) is like a recipe for a bread spice. The thing is though, how would you put a falafel into a bread. Home made falafel mixture, with freshly minced chickpeas, fava beans or lentils? Even better still why not use a box mix which has already been dehydrated and they've done part of the work for you already!


There's a really pretty falafel mix that I've been buying lately that has the potential to be really pretty in bread - the 'crazy' blend with beetroot and poppy seed. A bit like putting falafel in bread - crazy. This is my second try with it, and I do know that if you don't mix it in super well you could potentially get pretty patterns from the included beetroot. But, the first time I tried this mix I also had home-made humus in the bread and although tasty (and pretty) it didn't come out as open as I would have liked this.


This time around, I used the falafel mix in the main dough (in the saltolyse, or should I say falafelyse), and this had the benefit of creating a stronger dough with a less gritty texture to the final bread. Alas however, the beetroot effect was largely lost and all I got was a general pink and yellow ethereal glow to the loaves rather than the pretty patterns from my first go at it. Some VWG was added to the dough to compensate for the falafel mix, and who doesn't like their bread bouncy?


Was it worth it? It certainly made a very interesting bread. Obviously, great with humus. Obviously! These 'bread spices' brought in some wonderful flavours, and especially with a cheese and tomato sandwich I had some great taste moments. Might reduce the salt a touch on the next bread as it was a little salty.

Method was as follows:

    50m saltolyse, complete with salt and falafel mix

    Added levain using the dough hook for 2 minutes only.  Completed this with 35 slap and folds

    30 minutes later added bassinage of 50g of water that had been held back, bringing total water to 600g. Also added 4g of leftover falafel mix here.

    20 minutes later bench fold to close the dough up

    At 4 hours 45 min after adding levain pre-shaped into rounds

    20 minutes later final shape

    20 minutes later into fridge

    (next day, 16 hours later) baked the first bread - 230C with steam for 20 min, then 200C without steam. Second bread had an hour in the proofer extra time whilst the first one baked


JonJ's picture
JonJ

When it comes to omelette fillings the combination of miso paste and hummus is complementary and comforting, although I suspect I'm the only one who tries something like that with their eggs. And, it is true that miso, and hummus, when spread on hot buttered toast are simply delicious. So, my thinking was that together they could make for a great combination in a bread, even if it is difficult to imagine!

The recipe is a combination of Benny's miso bread (which used 10% miso) and Txfarmer's hummus sourdough. Txfarmer used quite a lot of hummus - 265g per 340g of bread flour, and she also, quite importantly used home made hummus. Although I do make my own, for convenience sake I bought tub of hummus which unfortunately only gave me 187g of hummus (so I used less than txfarmer), and halfway through I was worried that using a commercial hummus wasn't so smart as the sorbic acid in it might negatively affect the sourdough culture, but it seems to have been okay. For miso, I used this lovely "marumu inaka" red/brown miso.

The final dough had 340g bread flour, 187g hummus, 34g miso paste, 152g water (plus an extra 30g water added later as bassinage), 100g levain, 7g salt and 10g vital wheat gluten (as "insurance"). I didn't reduce the salt, as Benny also didn't, but he also didn't add hummus, and my final bread was fairly salty. I'd say to reduce or even leave out the salt if you're going to try this bread. The final dough was mixed for 5 minutes on the dough hook followed by 30 slap and folds. My notes say it 'bounced' when I tried to slap and fold, so was not really as stretchable as a regular dough. As stated above, I did add an extra 30g of water 30 minutes after that too, and once again it didn't handle as it normally does, my notes also say that the dough was slow to get a good gluten stretch, and it is these unusual dough characteristics that should have kept me alert to the moisture in the dough.

I messed up the baking! Because the dough felt fairly robust and not slumpy in the banneton I assumed it would bake the same as a normal loaf and this wasn't the case. I baked it side by side with a regular sourdough and that was a mistake - my habit is to turn the loaves when I remove the steam trays after 20 minutes and this bread was still very wet and loose and should not have been turned, and this turn seemed to knock it into a strange and wonky shape. Perhaps I should also have given a few small scores rather than the single 'ear' type score as well to contain some slumping. It did get an extra 15 minutes in the oven with the door cracked open afterwards, but certainly this bread should have been baked more carefully, as one does with a wet slumpy dough, and requires at least a full hour of low and slow baking with foil tenting.


This bread was super delicious. As the main ingredients were generously used, with ample hummus and miso, the flavours really came through and shone. It made for a lovely savoury breakfast bread, and since we had a friend visiting who was appreciative, it was cut a little too early, and a little too hot. And was superb with melting butter on it. And, finally, gone within an hour.

JonJ's picture
JonJ

Sourlotti by Abby has a great way for making an 'oat porridge' bread that has worked out well for me before. I think it might be the amount of butter in the soaker preparation that makes it work so much better for me? In any case, for this loaf I decided to eschew the butter and replace it with coconut oil which has been working very nicely for me as a substitute for butter in other recipes too like hamburger rolls.

Danni3ll3 made a bread with sprouted quinoa which was on my mind lately, and while I was prepping this bread I decided to use the white quinoa that I'd started soaking the night before for sprouting in this bread as well, even though it was intended originally for something else. The quinoa seeds didn't get much of an opportunity to sprout, and the stiff quinoa paste that I made out of them seemed flavourless, with only the merest sweet taste. This is what the quinoa paste looked like (basically soaked white quinoa seeds that had been moistened as if to sprout them, but only for 16 hours, and then ground in the food processor. Quite a stiff consistency. I added it together with the levain to the mix with the autolysed dough:


It was a bit bold to use that in this bread, in addition to the oat and flax soaker for which quite a lot is added - about 200g of that soaker was added by lamination to each loaf! But, miraculously it seemed to work out and the dough managed to hold all the extras in it.


Its hard to judge the hydration with these things - nominally a 93% hydration but a lot of that water is locked into the oats/flax in the soaker. And these loaves needed a long bake - 60 mins in total, because of the oat soaker. I squashed the one loaf a little trying to turn it 20 minutes in (when removing the steam trays). It was still very wet, even at that time and shouldn't have been touched.


The bread was nice to eat, and I did find myself choosing it over some of my other frozen loaves for quite a few days after. I would say though that it was fairly mild to the taste - the quinoa and oats didn't bring in as much flavour when compared to a bread like the 5 grain levain which I was mentally comparing it to. I do like the quinoa paste though and will probably try it again - it seemed to bake up nicely, and maybe next time I won't be so impatient and even give the quinoa a chance to sprout.

JonJ's picture
JonJ

Derek and Gavin have been baking very interesting breads with (sweet) lupin flour lately. The promise and attraction of these breads is, to put it in Derek's words, "..taste delicious not too overpowering very light in mouth and stomach afterwards..." and "completely devoured in no time!".

So, it was with these thoughts in mind that I made the impulse purchase of a bag of pigeon pea flour and found myself making a sourdough bread with it when I got home from the shops. The bag itself recommended using the flour for baking biscuits and crepes or pancakes. And I found a paper that said that "the bread from 10% pigeon pea flour blend with 2–3% vital gluten and 0.5% SSL had high loaf volume and loaf quality" so went for approximately that amount in the final dough:

pea flour formula


When mixing the dough there was a clear pea (vegetable) smell to the dough. Dough was a nice pale yellow colour, which carried through to an attractive golden appearance in both the crust and crumb of the final loaves. When the bread was first cut, I noticed only the very smallest amount some of that 'off' pea smell taste (far less than when working the dough), but that taste note was lost the next day when the sourdough flavour of the bread developed. The starter used was about 2-3 hours past peak (and it did have a small refresher feed, but nevertheless, the sourdough tang was present in the taste).

I'm not completely convinced that pea flour brought all that much to these breads other than the lovely yellow colour, and possibly an improved protein composition. Nevertheless, I've got plans to use it again, perhaps at 5% in a loaf together with semolina to bring out a strong yellow colour.

  • Method:

        1 h 15m autolyse

        Added levain using the dough hook for 1 minutes only (load shedding kicked in and had to stop there).  Completed this with 50 slap and folds

        30 minutes later added salt and bassinage of 52g of water that had been held back

        15 minutes later an additional 10 slap and folds to bring the dough together after the bassinage

        At 2 hours after adding levain, gave it a coil fold

        At 3 hours after adding levain pre-shaped into rounds

        20 minutes later final shape

        30 minutes later into fridge

        (next day, 9.5 hours later) remove from fridge while oven heats (for 45 minutes)

        Into freezer for 15 minutes

        Bake on baking steel together - 220°C for 20 minutes with steam, then 23 minutes without steam at 200°C.
JonJ's picture
JonJ

Psyllium husk is usually used in gluten-free or keto style breads where the gel that it forms can act as a binder and helps the loaf to retain its structure without slumping.

For a long time now, I've tried using psyllium husk together with my lower protein flours (around 11.5%) to see if I could make a better bread with these weaker flours and the results have been usually somewhat unclear.

So this post is my attempt to describe in one place some things that I've learnt, both good and bad, about the use of psyllium husk in baking in a non-gluten-free context.

The thing is, you don't need to add psyllium to a wheat bread. The benefit really is that it is a simple way that allows you to dramatically increase the hydration without risk of the dough slumping or baking a flat loaf. The dough becomes super easy to handle, the flow/rheology changes, and the dough holds shape. The crumb retains more moisture to it as well.

What are psyllium wheat breads like, is there an improvement? Initially I was adding around 2g of psyllium husk per approximately 500g of flour, and for these breads the results were unclear. The dough became much easier to handle, but beyond that it was difficult to pinpoint exactly if this was beneficial to the final bread.

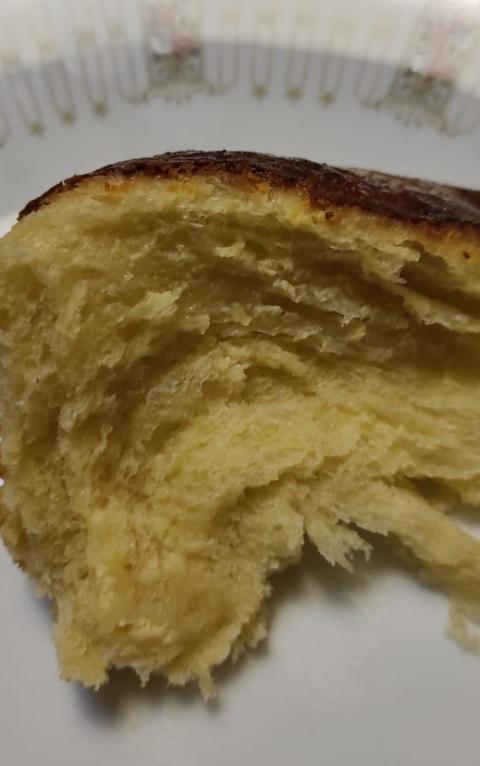
Lately I've been reading gluten free recipes that use about ten times as much, around 20g of psyllium. And so I moved up to 20g of psyllium, and whilst it made a beautiful wheat bread with 20g of psyllium, with a beautiful shape, in some ways the crumb looked a lot like those pictures you see of gluten free breads, a little too homogeneous, somewhat unnatural, and not at all like what you expect:

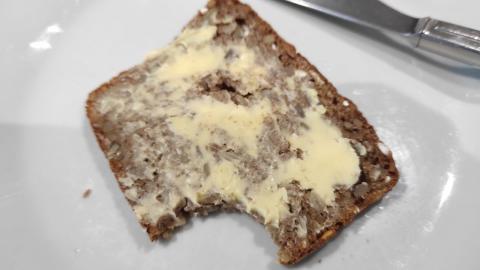
The unnatural looking crumb is visible in the photo above; it must be said though the texture of the bread was quite lovely, soft to the touch and without any noticeable taste change. The shape was good, almost as if the bread was formed in a mould. For this bread the psyllium gel was added at the same time as the levain to the autolysed dough using the dough hook, and the hydration was 87%.

______________________________________________________________________


In another, later experiment I reduced the amount of psyllium down to 6g, and wanted to compare adding a psyllium gel versus adding water by bassinage.

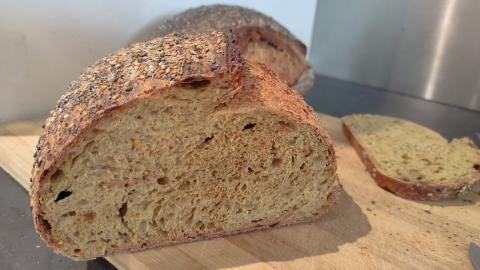
The loaf on the left used bassinage to increase the hydration to 75%;  the loaf on the right used Psyllium gel as the way of increasing hydration to 83% (the initial dough had a hydration of 70%, and was divided in half).


Note the Psyllium loaf had 'snail trails' on the surface, or deposits left on the surface from the gel. It also spread at the score rather than lifting the crust to make an ear, and had a softer crust and moister crumb, although the bassinage loaf had a nicer chew. Besides that they were fairly similar breads. The effort to add the psyllium gel addition by hand is a lot easier than bassinage is.

_____________________________________________________________________________________


Finally, psyllium has its uses to help with recovery from an over hydrated dough - I had issues with my scale and inadvertently mixed up a dough at a hydration of about 86% which was way too high for the flour used. To recover, I added 5g of psyllium husk into the dough, which stabilized it enough to continue to shaping and it kept its shape without slumping when it came out of the banneton. There were lumps from the psyllium, so the dough was not smooth when worked by hand, but this did not seem to carry through after baking.

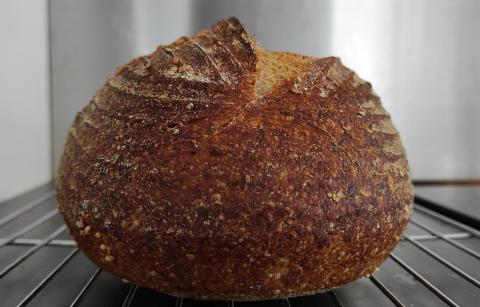
Once again there is no ear, and there is an unusual upright shape and way in which the loaf opens up. Interestingly, for this bread, the crumb was noticeably moister even one or two days after baking and quite nice to eat.

JonJ's picture
JonJ

Roosterkoek (or roosterbrood) are a traditional bread or bread rolls cooked over the braai (BBQ). The name is Afrikaans for rooster ("grilled")  plus either koek ("cake") or brood ("bread"). They are usually eaten piping hot together with the meat.

Many of the recipes are fairly similar and usually include sugar and oil in the dough. Where I differ a little is I like to give mine a little bit of shaping and bake them as pull apart rolls. Also, I'm not a great fan of them if they're cooked directly over the coals, which is the traditional way.

My method is to mix all the ingredients except the oil, with a Danish dough whisk, usually I mix the yeast, water, and sugar together and then add the flour and sugar to that. Then olive oil is kneaded into the dough after about 20 minutes. About 40 minutes after the initial mix the dough is weighed and divided into 9 balls that are shaped into rolls and placed on the dutch oven lid. About 1h15m - 1h30m after the initial mix they have normally puffed up enough to be baked. I like to bake 20 minutes on the cast iron base in the Weber with coals to the side and parchment underneath. Might turn it every 5 minutes so that it bakes evenly.


The lovely thing about them is that not only are they enjoyable to eat, they're also super convenient. If you forget to buy rolls. Or have run out of potatoes, they'll still be there for you.

JonJ's picture
JonJ

Last week Natalya Syanova of Natasha's Baking posted a short video of a babka with a cream cheese filling that I just had to make. The filling she used was made with cream cheese, an egg yolk,  sugar and vanilla, so you can imagine the resulting flavour, and she also use a brioche base for it to ensure a super soft and pillowy texture.

Instead of using her brioche recipe though, I used a Tangzhong one from Bread by Elise.

The resulting bread is delicious and so soft, although my guilt-o-meter is off the charts when I think of the cholesterol in it.

The crumb is super soft and shreddable with small pieces of cream cheese fat embedded in it and only the very thinnest layer of filling visible in the final bread. I might be inclined to use a more conventional babka dough if I was to repeat as the brioche dough kind of collapsed a little under its own weight while cooling.

And next time I'll chill the cream cheese filling so that it doesn't ooze out during the roll up step of the babka shaping!


Pages

Subscribe to RSS - JonJ's blog