The Fresh Loaf

A Community of Amateur Bakers and Artisan Bread Enthusiasts.
noyeast's picture

Different kinds of yeast

July 1, 2009 - 10:38pm -- noyeast
Forums: 

I would like someone to explain the various forms of yeast which are sold and what different techniques are required to use them.

I am familiar with dried yeast granules and what we call here "Surebake Yeast".  Surebake is granules plus enzyme powders etc and this is what we always used in the bread maker machines.  I have been using it more recently for all sorts of breads and it does a very good job, but is expensive. 

I wonder, can I use another, cheaper form of yeast? instead of surebake and if so, what difference will it make in the final loaf ?

Thanks,

LeadDog's picture
LeadDog

Lemon Rosemary Sourdough

I saw a post here on The Fresh Loaf  by someone looking for a formula for a Lemon Rosemary bread.  This combination sounded really good to me so I decided to give it a try.  First I had to decided how much Lemon Zest and Rosemary to put into the bread and I decided to try for about 2% for each of them.  Then I decided that I would use up the last of my bread flour and use some fresh milled whole wheat and rye.  I figured on a hydration of 70% and that the percentage of the sourdough preferment would be 20%.  It is summer time here and the temperatures have been hot so I figured less preferment would slow things down a little bit.  I now had a plan on how I was going to make this bread now I'll tell you how it went.

 The first night I made my first build of the preferment.

1st Build  Grams  Percent 
 Starter 50% 
 Flour 14  100% 
 Water 50% 
 Total 28 

200% 

 The next morning I add more flour and water to the preferment for the 2nd build.

2nd Build  Grams  Percent 
 1st build 28 54% 
 Flour 51 100% 
 Water 36 70% 
Total 114 

224% 


When I got home from work the afternoon I mixed the dough up as follows.  

 Dough Formula Grams  Percent 
 Flour* 571  100% 
 Water 400  70.05% 
 Salt 10  1.75% 
 Preferment 114  19.96% 
 Rosemary 11  1.93 
 Lemon Zest 12  2.10% 
 Olive Oil 11  1.93% 
 Total 1129  197.72% 

*Flours  Grams  Percent 
 Bread Flour 445  77.93% 
 Whole Wheat 69  12.08% 
 Rye 57  9.98% 
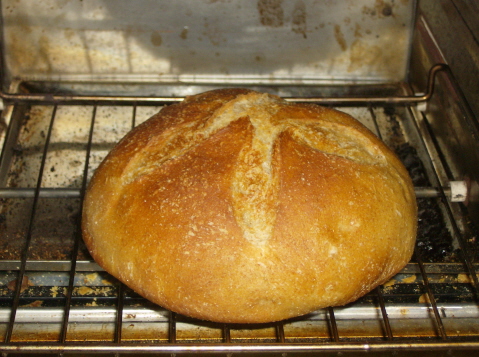
  First I dissolved the preferment into the water and then  mixed in the bread flour.  I let this sit while I went and milled my wheat and rye flours.  Next the wheat and rye flours were mixed in and the dough was let sit for 30 minutes.  We have Rosemary growing in the yard so I went and picked enough for 11 grams and then chopped it up into small bits.  I used a small grater to make Lemon Zest from one lemon and ended up with 12 grams.  I added the Lemon Zest, Rosemary, Salt and the Lemon Pepper infused Olive Oil all at the same time.  The rosemary went in first and my first reaction was it was going to just over power the bread.  The Lemon Zest went in last and after that all I could smell was lemon.  This seemed like it was going to be one powerful bread.  I mixed the dough until the gluten developed.  Then the dough was turned out into an oiled bowl and placed in the wine cellar for a cool ferment.  Four hours later I placed the bowl in the refrigerator so I could cook it when I got home from work the next day.  I checked the dough in the morning before I went to work and it had raised up to touch the plate that I place on top of the bowl.  When I got home that day the dough was lifting the plate off of the bowl.  I set the bowl out and let the dough warm up for two hours.  Then I turned out the dough on to a floured work surface and folded the dough over on itself to get some flour on all the surfaces of the dough.  When I looked at the dough after I did this the dough looked so nice I just want to bake it like that without shaping it any more.  I figured that if I rolled it over onto some parchment paper that it just might work.  Then I put the dough into a counche and turned the oven on to 460°F to preheat it.  I used a cast iron roasting pan to bake this bread in so it is oiled and preheated in the oven too.  When the oven gets up to temperature I place the dough in the pan and cook it with the lid on for 25 minutes and then the last 15 minutes without the lid.  The bread had great oven spring and just looked wonderful to me when I pulled it out.  The aroma of the bread just filled the house but now I had to get some sleep.  Cutting the bread would have to wait for the next day at work were my coworkers are my bread testers.   My testers really liked the bread.  They were eating great big slabs of the bread all day long.  I told my boss what kind of bread that I had made and she said she didn't like Lemon Rosemary.  Later a coworker tells my boss how great it tastes and talks her into trying a slice of it.  My boss then emails me telling me how great the bread is.  There were many great compliments on this bread, it was just incredible.


sharonk's picture
sharonk

I tried one of my newest gluten free recipes and came up with a very tasty bread. It had a nice crumb, a nice rise and a nice crust. When I travel I always bring my own bread. I was getting ready to travel to a family event. I sliced up one loaf and packed it in my suitcase. To be sure I would have enough bread I also took the loaf I had previously sliced and frozen the week before. When I got to my hotel room I unpacked the still slightly frozen bread, leaving it to thaw in the open air. Meanwhile, I happily ate the fresh slices as I moved through the weekend’s events. I had forgotten about the thawing slices in the open air until I began packing and saw them. Being unsure they were still good but unwilling to dump them, I repacked them and brought them home. When I got home I toasted up a piece and Wow! it was still fantastic! There were a few pieces left so I wrapped them in a cloth and set them on the counter to see how many more days they would still taste good. They were still excellent even 2-3 days later. So this was a previously frozen bread that had thawed in the stuffy air of a hotel room, inadvertently left in that same stuffy air for 3 days, repacked and traveled a total of 700 miles. The bread just would not get stale, old, or gross!


For a gluten free bread to be treated this way and still taste so good is very, very unusual. Most people who must eat gluten free bread, whether they bake their own or buy it fresh, eat it fresh for one day and put the rest in the freezer because it dries out so quickly. My gluten free sourdough bread stays fresh on the counter for 5 days wrapped in a cloth, sitting in an open plastic container. It keeps 10 days in the fridge if it hasn’t been eaten up by then. It also freezes, thaws and toasts up beautifully. I have always been proud of the long shelf life of this palatable bread.


The packed, frozen, thawed, repacked, retoasted loaf that was inadvertently ignored in the hotel room was an experimental loaf. I used one of my standard recipes and added 2 tablespoons of chia seed gel to it. Recently I baked another loaf using this same recipe, with chia added, and tested the limits of its shelf life. It lasted 10 days! stored on the counter, in a cloth, in an open plastic container. By day 8 it lost a little of its bounce but gained a great crispiness in the toaster.


Chia seed is a wonderful addition to baked products. Adding 2 tablespoons of chia seed gel to baking products will extend the freshness and shelf life. The chia seeds attract moisture which is retained in the baking product.


To make chia seed gel, take 2 tablespoons of chia seed and mix it into 8 ounces of water.


Stir with a whisk or fork every 5-10 minutes for a half hour.


It is suggested to let the chia seed gel sit for 12 hours before using.


It keeps for 2 weeks in the fridge.

davidg618's picture
davidg618

I'd planned to do yet another bake of classic baguettes ala Hitz' formula, but after seeing and reading Pamela's blog entry a week ago, and after comparing Dan's formula with what I've been doing--they are very similar except for the liquid levain--I gave into my temptation and made the DiMuzio formula. The only change I made was to scale the formula to 1000g final dough weight (four 250g small baguettes) which isn't really a change, merely a diminuation. The DiMuzio formula calls for instant yeast, in addition to the liquid levain. I considered not using it, ultimately deciding to be faithful to the formula.

I prepared the liquid levain from my starter cache, using the 3-Build process I've made my own, over a nineteen hour interval. I mixed all ingredients together in my stand mixer for five minutes--bread hook, on lowest speed--then 3 minutes on second lowest speed, rested the dough 30 minutes, did a stretch & fold, and started to chill the dough for overnight retarded bulk fermation. I did two more S&F at 45 minute intervals before I was satisfied with the dough's development. Left to ferment overnight in the fridge, approximately 12 hours. Next morning, I divided the dough, and returned half to the refrigerator. I let the dough rest for thirty minutes. It didn't reach room temperature, but it had doubled in volume so I divided it again in two,  preshaped, rested 20 minutes, shaped, and proofed for an hour. Baked for 10 minutes, with steam, at 480*F, cleared the steam as much as possible, dropped the temperature to 450°F and baked further to 208°F internal temperature. I had decided to do the bake in two two-loaf batches. The one time I baked four baguettes simultaneously, despite the convection oven, I experienced uneven baking among the loaves.

Meanwhile, I'd removed the remaining dough from the refrigerator.

I was pleased, with the first batch's oven-spring, but one of the two loaves had a minor blowout. I'm still not confident my shaping and slashing is what it should be, and the visual results of the first two loaves didn't boast my confidence even an iota. I prepared and baked the second two loaves like the first batch with two planned changes--and one mistake. Planned: I allowed the shaped loaves to proof 15 minutes longer, and I slashed approximately 1/4 of an inch deeper than the first batch. Unplanned: In a senior moment, I forgot to lower the temperature to 450°F after the first ten minutes.  I think this only effected the crust thickness and color. The second two loaves are on the right in the picture below. I removed the loaves, like the first two, at 208°F internal temperature.

The crumb is all I could ask for, and the flavor, in my perspective, not surprisingly, is better than the poolish initiated baguettes I've been baking. Let me hasten to add, I love their flavor as well, but the sourdough levain adds complexity absent in the classic baguettes. I especially like the crust's nutty flavor bursts, and the chewier crumb. Furthermore, the flavor is only mildly sour.

So, I'll claim a conditioned success: Taste: A, Visual: C. Procedures: C+; I got a lot of them right, but not all of them. I've watched shaping and slashing video's and read shaping and slashing instructions ad nauseum, but my hands haven't yet developed the muscle memory to be able to do it rightly, without thinking about it. More practice, practice, practice. At least I've got lots of mouths that love to eat my bread, regardless of how it looks. I did, however, see one neighbor close her eyes while chewing a mouthful. I had assumed it was a gesture of ecstasy, and felt flattered, but maybe, that wasn't the real reason!


carrtje's picture

Sprouted Grain Breads too dry.

July 1, 2009 - 11:01am -- carrtje
Forums: 

I've been moving closer and closer to a full whole grain bread as the daily staple.  I've been buying some sprouted grain breads to test out what I like and don't like.  It seems like all the breads with a higher content of sprouted grains  (intact) seem much drier, with less structure than other versions.

Anyone know a recipe for a good combination of whole sprouted grains: whole grain flour?  My family also likes adding things like nuts, seeds, cooked barley etc.
xaipete's picture

Milling Rye Berries

July 1, 2009 - 10:33am -- xaipete

I grind my own rye berries with a Nutrimill and have noticed that the mill appears to have a much rougher time (takes at least twice as long to grind and seems to almost clog up at times) when grinding them than when grinding, e.g., hard spring wheat. Grinding rye also creates a lot more powder in my kitchen, so much so that I always grind rye outside.

Pages

Subscribe to The Fresh Loaf RSS