The Fresh Loaf

A Community of Amateur Bakers and Artisan Bread Enthusiasts.
hanseata's picture
hanseata

Fall is the time of the year when Alsatians and wine loving Germans think: "Zwiebelkuchen"! For this mellow sweet onion pastry is the perfect companion to new wine.

If you travel in fall through the wine growing areas left and right of the Rhine, you will find inns, restaurants and many vinyards offering sparkling new wine (Federweisser). They often serve it together with freshly baked Zwiebelkuchen (Onion Tarte) or, an equally tasty variation, Porreekuchen (Leek Tarte).

But beware - Onion Tarte is an aider and abetter of that seemingly feathery light youngster, helping it go down so smoothly, that you are tempted to drink it like lemonade! When you wake up the next morning you realize why Federweisser is also called: "Sauser" (Buzzer) - there's something buzzing in your stomach and your head is spinning...

You find the recipe for Zwiebelkuchen or Leek Tarte here: http://hanseata.blogspot.com/2010/09/zwiebelkuchen-onion-or-leek-tarte.html

  Leek Tarte

metropical's picture

zucchini parmesan loaf

September 20, 2010 - 8:02am -- metropical
Forums: 

Has anyone a good recipe to share?
I used this one.
It's OK, but not thrilling.

- 3 cups all purpose flour
- 1 cup zucchini, peeled and shredded
- 1/3 cup sugar
- 3 tablespoons Parmesan cheese (more if desired)
- 1/2 teaspoon baking soda
- 1 teaspoon baking powder
- 1 teaspoon salt
- 1/3 cup butter
- 1 cup buttermilk
- 2 eggs, slightly beaten
- 1 tablespoon onion, grated

SallyBR's picture

Polenta-Crust Tomato Loaf, another Lepard tasty bread

September 20, 2010 - 7:05am -- SallyBR

Very nice and easy bread to bake, wonderful crumb color and intensely flavored.    

Plus, it worked well in my electric oven, which is a plus nowadays... :-)


The link to my blog entry is here, where you can find the whole recipe (from The Guardian website)


http://bewitchingkitchen.com/2010/09/20/polenta-crust-tomato-loaf/


but I also include a photo for those who don't want to go to the blog

foodslut's picture

Are YOU addicted to baking bread? :)

September 20, 2010 - 6:06am -- foodslut
Forums: 

I just HAD to share this from a friend of mine (who really has worked in the addiction treatment field, and is a great baker) when I wondered whether I was getting addicted to baking - enjoy!

"I don't see the clear signs of addiction:

- The constant urge to bake despite the negative consequences of doing so, such as your partner pleading with you to stop and/or they're contemplating the end of the relationship because of your constant baking (assuming that you haven't chosen a partner based on THEIR bread lust);

kamp's picture

I have made 200 bread and now the recipe fails.. help!

September 20, 2010 - 5:39am -- kamp
Forums: 


I have made maybe 200 bread the last year or maybe more. I don't know. I have found a recipe that has always worked.

But now it has suddenly stopped...

I use the exact same recipe.

This is normal:

And this is how it gest now:

Sometimes it also falls in the middle (like a u)

Sometimes is also seems a bit raw..

OldWoodenSpoon's picture
OldWoodenSpoon

Okay, after all the compliments and enthusiasm over my new WFO, it is time to tell the dirty details of something I only just touched on in my earlier blog post:  the little matter of too much fire too soon, and the problems with the doorway arch.

Saturday morning I got over enthusiastic throwing wood into my "small drying fire".  My wife admonished with "Isn't that a little big?", to which I replied in my best know-it-all tone "No honey, you should see a big fire!".   Then we noticed the cracks, and the top bricks of the arch sagging from thieir proper position.  After much running around for steel buckets, fireplace tools, water and my heavy elbow-length gauntlets (it was really hot in there) I shoveled the live fire out of the oven as fast as I could and doused it with water in the bucket.  It was too late though, and the damage was done:

The crack is not all that bad, but the brick problem is another story.  A couple of days earlier we had noticed these bricks had come loose.  When I investigated, the mortar and the bricks had all separated from each other and the mortar was just loose slabs between the bricks.  This next shot makes it easier to see both the loose mortar and the keystone brick dropping through the top of the arch as well as a head-on view of the crack.


I hoped the insulation layer would secure things together, but the heat expansion in the dome proved I was just wishful thinking.  Something had gone wrong somewhere and my arch was coming apart as I stood there.  You can see the tops of two bricks I wedged into the arch to hold things up while the oven cooled off and I figured out a plan.


Here you can see my solution, if you look carefully.  I hope we can get a better shot of this tomorrow when the light is better, and I will edit that shot in here if we are successful.  However, if you can see it, my solution was to break another rule about ovens:  I installed a metal arch support in the form of a hoop shaped to fit inside my arch.  I made the hoop loose fitting, and then loosely packed a wood stove door gasket made of a fireproof, non-volatile glass fiber between the hoop and the brick to take up the slack and provide compressible space between the hoop and the masonry.  These materials expand at different rates and to different extents, and I have no idea if this will work or not.  Since my alternative if it fails is to rebuild the arch, and my alternative if I don't try this is to rebuild the arch, this is a free chance to get lucky.  As you can see in this shot above, I pulled all the old loose mortar out of all the arch joints.  That's all it took too:  I just grabbed it bare-fingered and pulled each wedge out in one piece.

While working on all this and running around I noticed something I now call "probable cause".  Earlier, I blamed this whole incident on too much fire in a green oven, too soon.  The next shot proves I could be wrong about that.  It certainly was contributory, but I'm not sure it was the cause at all.  I think I made a bigger strategic error earlier in the building process, in how I joined the arch and the dome.  If you look carefully at this next shot, especially at the very top brick, you will see it is tilted up to the right.  This brick was dead-level when I built the arch.

Here's what I did and what I think happened:

- When I mortared the arch originally I only mortared the front 75% or so of the wedge-shaped gaps.  I left the rear 25% empty so I could tie in the oven dome itself.  This was, I believe, the fatal flaw.

- As planned, I built the dome and filled in the rear-most 25% of these mortar wedges in the same pass as building up the dome, effectively making those parts of the arch an integral part of the new dome.  I also added a layer of oven mud over the top of the back 25% of the arch as well, thoroughly integrating the arch and the dome.

- I sat back and watched it all slow-cure as I kept the dome and the dome-arch joint draped with moist towels for three or four days, and then under cover of dry towels for two or three more days, all to slow down the surface drying and let the inner clay keep up better.  During this time the new dome showed some stress cracks from drying, which I worked over with the back of a spoon as much as I could to try to iron them out.  Honestly, it did not help much, and my overzealous drying fire on Saturday morning brought them all back.

Now, look again at the tilt up-to-the-right of that top brick in the shot above.  I believe the oven dome shrank significantly in drying, and because the doorway arch was so throughly integrated into the dome, the dome squeezed the arch in on the sides and down on the top at the back edges of the arch bricks, popping all the mortar loose and opening up bigger gaps between bricks than were there when I built the arch originally.  When the arch alone was complete, the inner surface was continuous, with the inner edges of each brick neatly and firmly in contact with the edges of it's neighbors.  Now it looks like carved jack-o-lantern teeth.

The fact that I built too hot and too large a fire on Saturday only brought all this to the fore sooner.  I now believe I doomed this arch when I tied it so tightly to the dome of the oven.  Nothing I read told me I should do this, and it also did not tell me I should not.  I learned that part myself.

I installed the new metal arch support today, and also re-mortared the arch.  Now I will give the fresh mortar in the arch a couple days to dry out and go back to small (yes, really small!) drying fires to slowly cure the oven dome and all, and see how it goes.  When I am finally able to really heat things up I will find out if my metal arch is going to be a help or the final straw that destroys the doorway arch.  Then I will know what the next chapter will be.

Thanks for listening, and stop by again.  I'll continue to post my progress, positive and negative, right here.

OldWoodenSpoon


dmsnyder's picture
dmsnyder

In my continuing search for whole wheat breads to add to my list of favorites, today I baked the “Sourdough Whole Wheat Bread” from Michel Suas' “Advanced Bread and Pastry.” I had previously baked the Honey Whole Wheat from AB&P, but still prefer Peter Reinhart's 100% Whole Wheat from BBA to it.

Most of my bread baking is with sourdoughs, and I want to have a sourdough whole wheat bread that I really enjoy in my repertoire. The one I have made - I can't remember where I got the formula - was not to my taste. I just didn't like the combination of sourdough tang and whole wheat flavor. On the other hand, I have enjoyed other sourdough breads with a high percentage of whole grains, so the AB&P formula seemed worth trying.


Levain


Ingredients

Baker's %

Wt (oz)

Bread flour (KAF)

95

2 3/8 oz

Medium rye flour (KAF)

5

1/8 oz

Water

50

2 oz

Starter (stiff)

80

2 oz

Total


5 7/8 oz


Final dough


Ingredients

Baker's %

Wt

Bread flour

40

5 7/8 oz

Whole wheat flour

60

8 ¾ oz

Water

76.6

11 1/8 oz

Yeast (instant)

0.16

1/8 tsp

Salt

2.53

3/8 oz

Levain

40

5 7/8 oz

Total


2 lb

Yes. I know it's not “pure” sourdough, and it's not close to purely whole wheat, but if Chef Suas wants to call it “Sourdough Whole Wheat,” who am I to quibble?

Procedure

  1. Mix levain ingredients and ferment at room temperature for 12 hours.

  2. Mix all ingredients to medium gluten development. The dough should be quite tacky.

  3. Bulk ferment for 2 hours.

  4. Divide into 2 equal pieces and preshape for boules or bâtards.

  5. Let the pieces rest, covered, for 20-30 minutes.

  6. Shape as desired.

  7. Proof en couche or in bannetons for 60 to 90 minutes.

  8. Bake at 450ºF for 35 minutes with steam for the first 12-15 minutes.

  9. Cool completely before slicing.

I mixed the dough in a KitchenAid stand mixer for 3 minutes on Speed 1 and about 7 minutes on Speed 2. After bulk fermentation, the dough was still tacky but very extensible. I rested the loaves seam side down after pre-shaping. This was a mistake. There was enough flour on the seam side to interfere slightly with final shaping. (See my boule tutorial.) I recommend proofing seam side up.

I think I slightly over-proofed (90 minutes) and got less oven spring than I thought I should get with this bread.

The crumb was quite chewy. The flavor was rather simple – A very slight sourdough tang and a straight ahead whole wheat flavor with no grassiness or bitterness. I look forward to tasting the bread as toast in the morning and as a sandwich for lunch tomorrow.

David


GSnyde's picture
GSnyde

Having carefully considered various names for this bread (http://www.thefreshloaf.com/node/19635/sourdough-typology-sjsd-sfsd-or-what), I have freely decided that it deserves to be called "San Joaquin Sourdough".  I used David's SJSD Version 10.23.09 with a 60% hydration all-AP starter (http://www.thefreshloaf.com/node/14140/san-joaquin-sourdough-another-variation-produces-best-flavor-yet).  Though there are many steps, including a lengthy cold bulk ferment, and two 3-or-so hour periods when one has to be continually close to the kitchen (one for mixing, autolysing, and stretching-folding, and the other for dividing, pre-shaping, shaping and baking), the process fit nicely into a weekend, starting with mixing the starter Friday night.  A person with a 9-to-5 job could do it in a Friday and Saturday or a Saturday and Sunday, by mixing the starter on the first morning, mixing dough and getting to the cold bulk ferment the first evening, and shaping and baking the second afternoon or evening.

The process gave me a good chance (as a novice baker) to observe by sight and feel how a lean sourdough behaves at various stages.  Here's the bulkly fermented dough at my "bread station", just adjacent to the all-important espresso station.

IMG_1564

And here is the glorious dough ball just before it is cloven.

IMG_1566

The pre-proofing after pre-shaping is the perfect time for an espresso.

IMG_1568

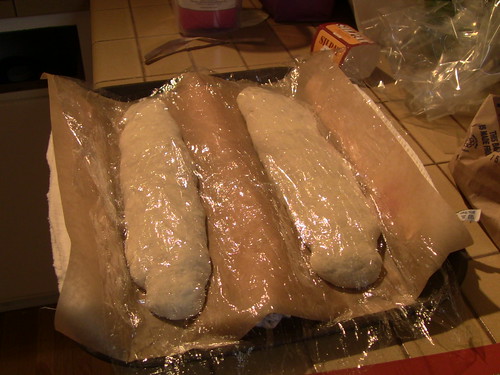
Here are the ill-formed batards, once again looking like my typical batardettes, proofing.

IMG_1570

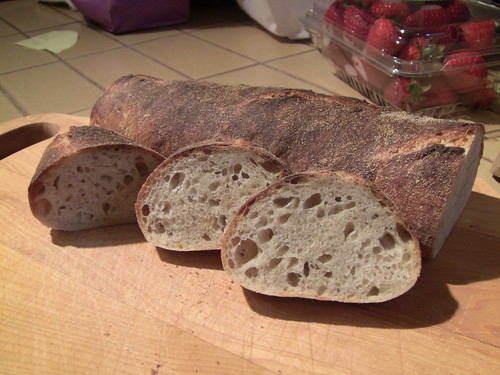
After a 24 minute bake, the finished product looks pretty good, though not much grigne in my first attempt at scoring with my new lame.

IMG_1571

IMG_1575

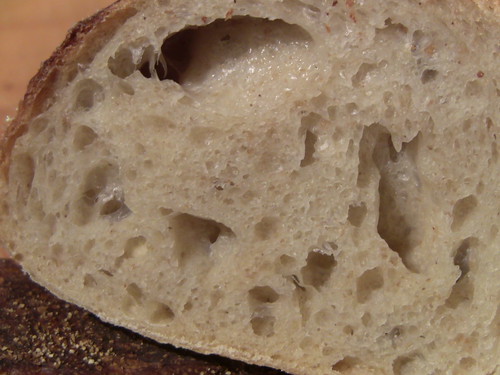
I'm very happy with the crumb structure.

IMG_1584

IMG_1578

Except for my still-pitiful batard-shaping and the wimpy oven spring, this was a successful experiment.  And from the still-pitiful batard-shaping and wimpy oven spring, I learned some lessons that will improve my skills next time.  I should not shape the batard from such a stretched out starting point--a semi-flat football shaped oblong would be better.  And I need to score the loaves slightly more deeply and consistently.

The taste and texture are marvelous.  Slightly sour, very complex flavors.  Very moist, chewy but tender crumb and crispy crust.

The bread came out of the oven at 3, and some friends came over for an early dinner of all sorts of things that go with sourdough bread--smoky ham, Toscana salami, Jarlsberg cheese, egg salad, tomatos.  The SJSD and the re-heated Onion-Curry-Cheese Bread from Friday were both big hits.

This bread is a favorite.  

And making it is pretty fun!

Thanks, David, for the recipe and all the guidance.

Glenn

eat.bread's picture

Baking Bread in Boston

September 19, 2010 - 7:17pm -- eat.bread
Forums: 

HI!

I'm pretty new to baking bread, within the year or so, and brand new to this forum.  I am looking to buy bread flour in bulk in the Boston area.  Also looking for any other bread baking tips for the Boston area, favorite spot to buy supplies, loaf pans, etc.


Thanks,

Emily

csimmo64's picture

Baker's Schedule questions

September 19, 2010 - 6:14pm -- csimmo64

Hi Professional Bakers,

I work in a small bakery and I am trying to take some cues from more established bakeries. Currently we mix each dough the day before with a simple recipe. Each utilizes a ripe poolish.

We ferment, then shape and retard the loaves before the next morning bake.

I have been reading a few artisan breads books and it seems that some utilize making one basic bread recipe and making a large variety of breads from that one style of dough.

Pages

Subscribe to The Fresh Loaf RSS