My Sourdough Starter Routine: FAQ
December 30, 2014
I get questions about how I manage my sourdough starter frequently enough that I decided to put the information in a single blog entry to which I can refer in the future. What follows applies to a sourdough starter/levain containing mostly white wheat flour. Mostly rye and mostly whole wheat starters are different beasts.
Please understand that this is my routine. It has worked well for me for a number of years. I am not presenting it as the only way to manage sourdough starters. It may not be the best way at all for some one else. But, as I said, it works for me, and here it is:
My starter was originally was purchased from KAF in about 2008. (See: Classic Fresh Sourdough Starter - 1 oz.).
Taking care of mother
I keep my "mother starter" in the refrigerator. It is fed at a ratio of 1:2:4 (Starter:Water:Flour). When feeding the mother, I mix 50 g starter, 100 g water and 200 g flour to make 350 g total. This is refrigerated imediately after mixing. I refresh the mother every 2 to 3 weeks. The flour feeding is a mix of 70% AP, 20% WW and 10% Medium or whole rye.
Getting active
When preparing to make bread, I generally refresh the starter as a liquid starter at a ratio of 20:50:50 (Mother starter:Water:Flour) using the same flour mix described above. This is fermented to peak activity at room temperature (generally about 12 hours).
This refreshed liquid starter is then fed again according to the specific formula I am following. In other words, the degree of hydration, the flour mix, the ratio of levain:water:starter and the fermentation time and temperature are variable. When posting a formula, I specify these variables. This may involve converting the refreshed liquid starter to a firm starter.
Ripening
How long it takes to ferment a starter before it is ready to feed again or mix in a final dough depends on four variables (at least those are the ones I can think of at the moment):
What flours you put in the starter. For example, flours with whole grains ripen faster because of their mineral content.
The ratio of seed starter:flour:water. If you introduce relatively more seed starter, it has a “head start” and will ripen faster. All other things being equal, a more liquid starter will ripen faster than a more firm starter.
The ambient temperature. A warmer temperature speeds up metabolic processes, including fermentation, at least within the usual range of kitchen temperatures. (The Temperature/Metabolism curves for fermentation and acid production are beyond the scope of this FAQ.) This effect can be rather dramatic. As a consequence, any instruction for how long to ferment a levain without specifying the ambient temperature should be taken with a grain of salt. (In fact, adding salt to the levain is one way of slowing fermentation down, but that's another topic for another day.)
The flavor profile you want for the bread you are making. A “younger” levain will generally be less sour. A more “mature” levain will have more acid and make bread that is more sour. (Assuming the formula for the bread is otherwise the same.)
How can you tell how ripe a levain is?
There is a lot of confusion about the criteria to use in judging the ripeness of a levain. The most common criterion I see is how much it has expanded, and “doubled in volume” is most often the specific criterion. The problem with this is twofold. First, unless you are fermenting your levain in a graduated container or have marked your container yourself, doubling is hard to measure accurately. Second, I don't think doubling carries the same meaning for liquid as for firm levains. And, at no extra charge, here is a thirdfold: Depending on the flavor profile you want, doubling (even if you could measure it accurately) may be too much or not enough.
So, as implied, I use somewhat different criteria depending on the levain's hydration, and I do use a container that is graduated, and I do use a semi-transparent container, so I can view the internal structure of the levain, not just its surface. My container is also tall relative to its diameter and has relatively straight sides. It is more like a cylinder than a bowl. This provides support to the ripening levain that permits greater expansion.
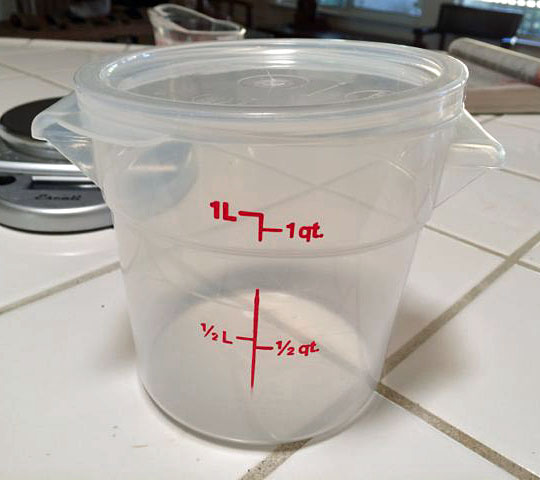
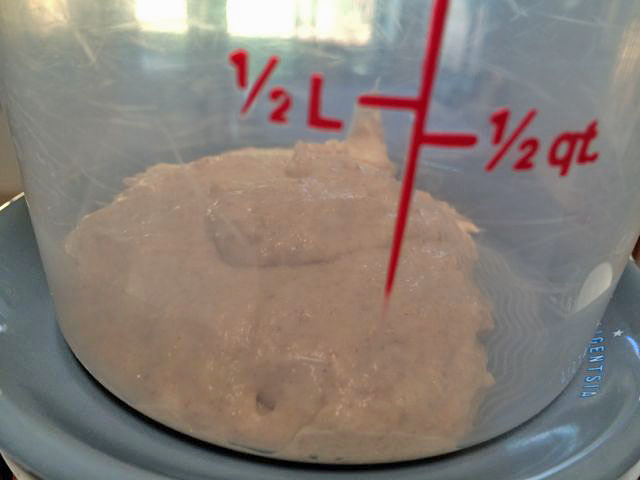
My Sourdough Starter Fermentation Container
Ripeness criteria for a firm levain
A firm levain is one with a hydration level of around 50%. That is, it contains half as much water, by weight, as flour. A firm levain can expand in volume a lot more than a liquid levain. So, volume expansion is actually a useful criterion for ripeness. A doubling in volume is generally associated with enough yeast activity to raise your dough well, but it may not be ripe enough to have fully developed flavor. I usually let my levain triple or quadruple in volume before I mix it in the final dough. In addition to volume expansion though, I look for an extensive network of large and small bubbles throughout the levain. I can see these through the walls of the container. I look for a well-domed top of the levain. And, last but not least, I look for any signs that the levain has had a decrease in volume, which indicates excessive ripeness. This is indicated by a concave surface, rather than a dome.
There is a lot of wiggle room between “ripe enough to raise dough” and “peak of fermentation, just short of collapse.” A less ripe (“young”) levain will make a sweeter bread, one with more creamy flavor from lactic acid formation. A riper (“mature”) levain will have relatively more vinegar-like, acetic acid sourness. Besides the criteria already mentioned, the aroma of the levain tells you the relative prominence of lactic versus acetic acid. You could use your sense of smell alone to judge when your levain is at the point of maturity you desire, in order to achieve the flavor profile you want for your bread.
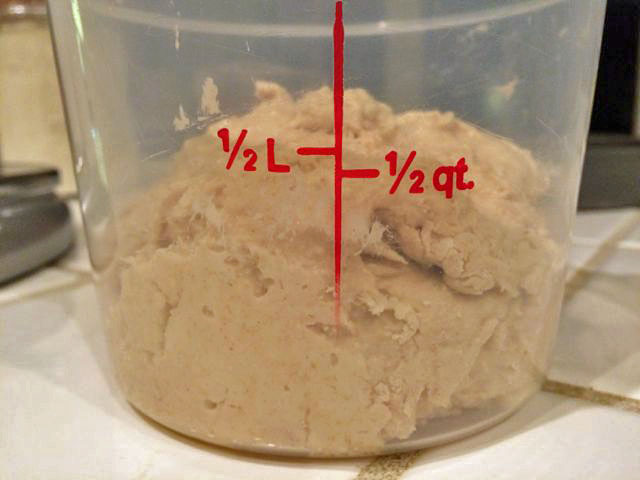
Firm Levain, just fed
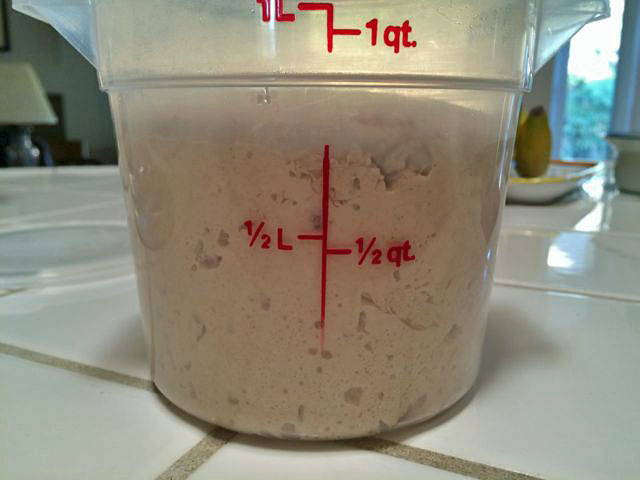
Firm Levain, 10 hours after feeding. Note: Approximately doubled in volume. Full of bubbles. Domed surface. I regard this as a still "young" levain.
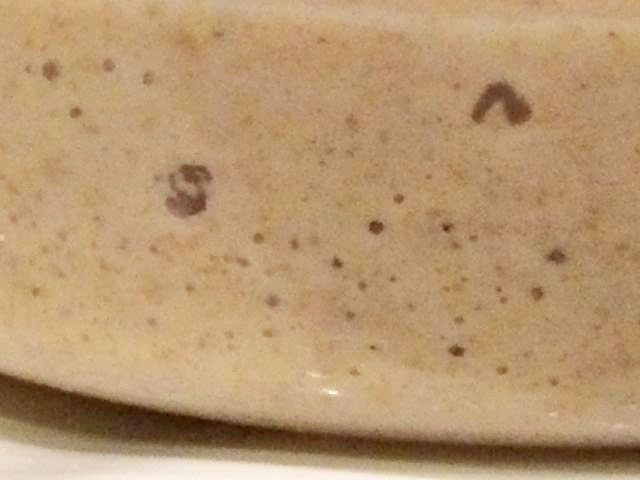
Firm Levain, after 10 hours. Note: Domed surface. Some bubbles on surface.
Ripeness criteria for a liquid levain
A liquid levain is one with a hydration level of around 100%. That is, it contains equal weights of water and flour. A liquid levain cannot expand as much as a firm levain. Quite simply, all those water molecules get in the way of connections between folds of the long gluten molecules that provide structure to a firm levain and a bread dough. Now, a liquid levain does expand as fermentation produces CO2 gas, but this forms bubbles that rise to the levain surface and pop rather than getting trapped in a gluten web and causing levain expansion. If you use a glass container or a semi-transparent plastic one to ferment your liquid levain, as it ripens you can see the internal structure of the levain become full of tiny bubbles – almost like a mousse. On the surface, you see bubbles forming, faster and faster as the levain gets riper, until they actually form a froth on the levain's surface. The surface of the ripe levain often has a "wrinkled" appearance.
As with a firm starter, one can choose to use the liquid starter “young” or more “mature.” With a liquid starter, as with a firm starter, levain recession or collapse indicates that you have let your levain over-ferment.
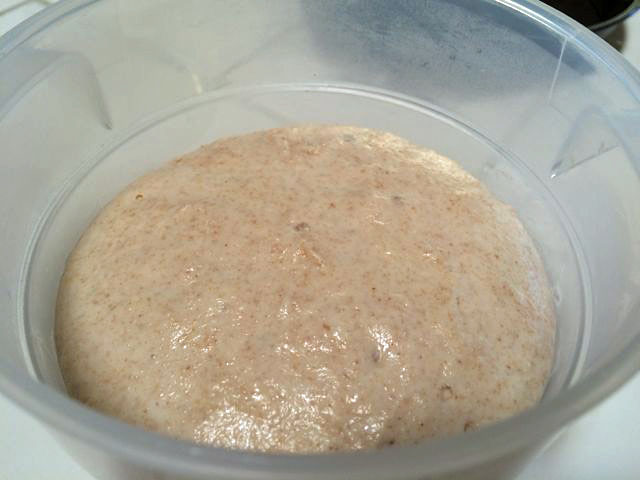
Liquid Levain, just fed.
Liquid Levain, just fed.
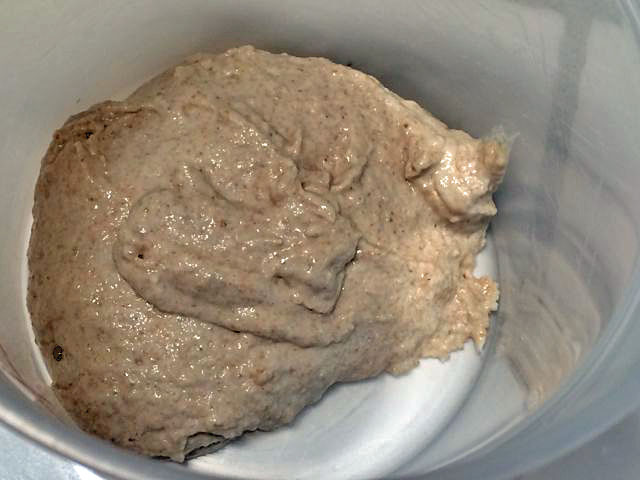
Liquid Levain after about 9 hours fermenting at room temperature. Note: Bubbly interior.
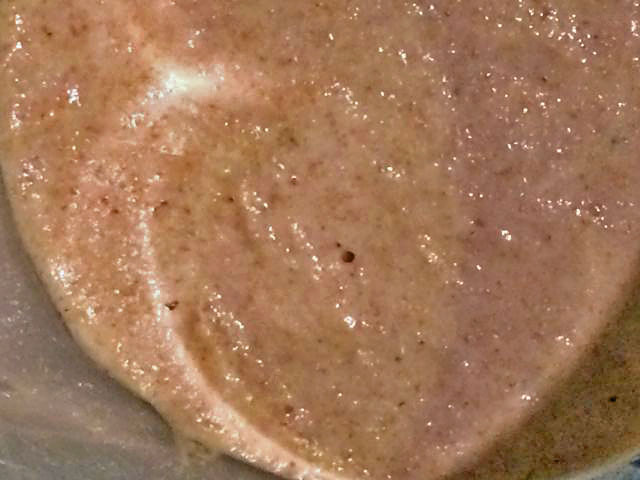
Liquid Levain surface after about 9 hours fermenting at room temperature. Note: Bubbles forming. Surface just beginning to wrinkle. This would still be "young."
The consequences of levain over-fermentation
Over-fermentation implies any combination of several bad things. The yeast may have fermented all the free sugars they can get at. Reproduction and fermentation will both slow down. The levain may not be as potent in raising the dough to which it is added. The levain may also contain excessive amounts of metabolic byproducts, especially organic acids. A little acid is good for both flavor and gluten strength. Too much acid is bad for yeast growth. An optimally ripened levain has positive effects on gluten structure, but, over time, protease activity increases, and those enzymes will degrade gluten. (That's why a very over-ripe sourdough starter that hasn't been fed new flour for a long time gets more and more liquified.)
What's missing?
There is another important variable in my routine for sourdough starter feeding and use, and that is the manipulation of fermentation temperature. Temperature effects the rate of yeast and bacterial growth and metabolism dramatically. Different metabolic processes are favored by different temperature ranges. Temperature changes can change the flavor of your bread. However, that is an advanced topic which is beyond the scope of this FAQ.
The one temperature manipulation I will discuss is cold retardation. I often refrigerate my levain, usually at the point that it is nearly fully mature. I do this for two reasons, primarily. The first is, quite simply, my convenience. If I have to go out (or go to bed) at the point that a levain is going to be optimally ripe and ready to mix into a dough, I will stick the levain in the refrigerator, maybe for a few hours, maybe for a day or even two. The other reason I refrigerate a levain is to make it more sour. Especially a firm levain will generate more acetic acid in a cooler environment.
If I have refrigerated my levain, before mixing it into the final dough, I will usually let it come to room temperature. Sometimes, I will let it ferment further at a warm temperature, for example 86 dF in a proofing box. It is appears almost over-ripe already when it comes out of the refrigerator, I usually use warmer water when I mix the dough, so the over-all dough temperature is no excessively lowered by cold levain.
I believe I have addressed the questions I get asked most often about my sourdough starter care and feeding. As indicated, there are additional more advanced topics I have not addressed in this FAQ. Maybe I will another day.
I hope this helps.
Happy baking!
David