
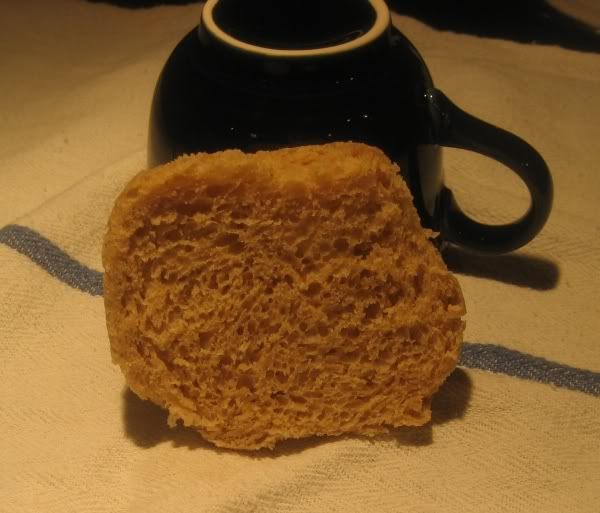
100% WW rolls - moderate success
I made a stab at some 100% WW rolls today. (Well, I did sub in about 70 grams of white cake flour because I didn’t have enough WW pastry flour.) I was surprised to realize that shaping those little balls was a lot more difficult than shaping a loaf sized boule. I’m generally happy with the results, though I probably should have allowed the rolls to proof longer. Laurel suggests allowing rolls to actually overproof. The final rise time is projected at 45 minutes in a 95F environment. I didn’t have an easy way to create a proofing chamber for a sheet of rolls, so they took a lot longer, and I was impatient.. Here’s a shot of the crumb. That's an 8 oz coffee cup for reference.
Whole Wheat Dinner Rolls for Thanksgiving
- based on Dinner Rolls for Aunt Agatha in Laurel’s Kitchen Bread Book
SOAKER
35 grams potato flakes
150 grams WW pastry flour
50 grams finely ground red WW flour
230 grams finely ground white WW flour
¼ cup buttermilk powder
1 tsp. Salt
340 grams water
BIGA
470 grams finely ground white WW flour
340 grams water
½ tsp. Instant yeast
FINAL DOUGH
All of soaker
All of biga
7 Tbsp. extra WW flour
2 tsp instant yeast
3 tablespoons honey
1 egg
1 tsp salt (increase to 1¼ tsp)
¼ cup (56 grams) soft unsalted butter – ½ stick
Chop BIGA and SOAKER into several pieces with bench knife. Mix with remaining ingredients on slow speed for 1 to 3 minutes, using extra flour only if necessary. Switch to dough hook, and knead for 2 minutes. Let rest one minute or so, then slowly knead for about another minute, checking for windowpane.
Let dough go through one rise and then shape, rise and bake. .
For a brown and serve roll, bake at 275F for 30 minutes. To serve, preheat the oven to 450 and bake the rolls about 15 minutes, or just until nicely brown. Don’t overbake.
As with any bread, don't cool them on the baking sheet! I parbaked them at 275. When they cooled for about an hour, the top surfaces had shriveled just a tad, and the bottoms were a bit moist. Next time I'll use a cooling rack!
If time permits, I'll do a 2nd attempt before Thanksgiving. For one thing, I'd like to see if the shaping gets any easier with more practice. But for now, these are in the freezer, and will do.


Kippercat, I forgot to say ( in the other post) that your rolls look lovely, or at least the crumb does. Are they as tender and fluffy as they appear to be? Well done, A.
Thanks Annie. Yes, they are tender and fluffy - just not quite as pretty as I would like.
They look delectable! By the way, where did you find buttermilk powder?
I ordered it from King Arthur Flour. To my surprise, it's also available from Amazon, but in a much larger quantity.
JMonkey,
If I remember correctly, you are now in the Northwest. Fred Meyer sells Buttermilk Powder from Saco Foods in one pound packages on the baking aisle. It is recommended to add it with your dry ingredients rather than reconstitute it for use.
-Denise
The crumb looks beautiful, now lets work on the surface. Shaping rolls is quite easy, it just takes a bit of practice and one helpful tool. I will try to explain how I do it and hopefully it will help you. If you have any questions, please feel free to just ask.
Find an empty large holed spice type shaker jar. I use one from dehydrated onion pieces. Make sure it is clean and odor free. Fill it half way or so with flour. I keep mine in the baking cupboard with its screw cap in place, for ready use whenever I bake.
Take a piece of dough 3-4 oz. in the palm of your left hand. Using your right hand, gently roll the dough ball around the palm of your left hand while putting a slight bit of downward pressure on the right side of the ball, causing it to slide and drag. What you are trying to do is to round the dough ball while creating a bit of drag on its left side against your palm. This will cause a tightening of the dough surface and give it a nice smooth appearance. If the dough gets sticky, very lightlly sprinkle some flour from the previously mentioned shaker on top of the dough and continue to roll. You sould get nice round smooth skinned dough balls. This is the same technique you would use when making your boules on the bench, just a much smaller scale and using your hand instead of the counter surface.
If I were more technically adept, I would post pics, but I still live in the stone age in some ways. LOL. ~Docpat
It never occurred to me to roll against the opposite palm. I'll give that a try. A 3-4 ounce piece of dough might be easier to work with than the 2 ounce I was using. I love Elaine W.'s idea of making rolls for the freezer out of small bits of whatever bread she's making, so I might do that for some practice.