The Fresh Loaf

A Community of Amateur Bakers and Artisan Bread Enthusiasts.

Raluca's blog

Raluca's picture
Raluca

Aaaand yes, the third one is the Tartine basic whole wheat..
So far this one has proven to be the best whole wheat I have baked and a good ratio of whole wheat around 73%.

I will be baking this one going forward for sure!


Raluca's picture
Raluca

As I said, I have three breads that I keep baking, with different results really...

Hopefully I'll get there and I will get them consistent in every way.

This one is Hamelman's - Pain au levain.


Raluca's picture
Raluca

Hi everyone,

I am still baking these days, but just not enough time to share all my breads and tries with you...

I thought I'll just share some photos of the breads I've baked lately.

I am baking three breads over and over again these days, trying to get them consistently good...Sometimes I struggle ;).

This is the first one: the seeded white bread - the recipe can be found in the posts below.


Raluca's picture
Raluca

I haven't been here in a while. Life has been busy..hectic..sometimes tiring..

But, I am not here to complain, but to tell you about the good things that happened:

I took a bread baking course at the E5 Bakehouse in London and loved it! That's why I went back and wrote an article about them for the amazing Bread Magazine - the August issue.

I didn't do much baking after the course, unfortunately, but I did visit an English institution: Shipton Mill, one of the last traditional mills in the country and wrote another article about them for the October issue of Bread Magazine.

I loved the visit and most of all I love the fact that I bought some amazing flours and two of them I used in the making of this loaf, that is now our favourite: Canadian Strong White Bread Flour and Seeded White Organic Flour.

Sooo, here it is all about the loaf.

seeded2

Time schedule:

Day 1: Make the preferment, leave for 12 hours at room temperature to mature. I don’t know exactly what the temperature in my kitchen was over night, I guess not above 21C, so I've left mine for about 13 hours and a half. I usually leave my preferment for around 12 hours until it’s nice and bubbly and has not sunk. You can test if it’s ready by putting a spoon of it in a bowl of water, if it floats it’s ready, otherwise it needs more time.

Day 2: Make the bread

    • Mix the preferment with the water and flour.
    • Leave to rest for 30mins (autolyse)
    • Add the salt and mix for 3 minutes on low speed and another 2 minutes on medium speed
    • Leave to rest for 50mins
    • Perform 1st stretch and fold
    • Leave to rest for 50mins
    • Perform 2nd stretch and fold
    • Leave to rest for 50mins
    • Preshape the bread
    • Leave to rest for 15 minutes
    • Shape the bread
    • Proof it for 110mins
    • I've baked the bread on a pre-heated baking stone at 230C for 5 minutes then reduced to around 215C for the next 40 minutes - this is because my oven is very small and the bread is too close to the heat.

Sourdough culture: For this bread I used a 100% hydration, 100% white sourdough culture.

seeded5

Recipe for 1 loaf (aprox. 67% hydration):

Flour: For this loaf I used Canadian Strong White Bread Flour and Seeded White Organic Flour. from Shipton Mill.

Ingredients for the preferment:

Make it 12 hours before you want to start on your bread.

IngredientQuantityBaker's %
Strong Canadian Flour115gr100%
Water115gr100%
Sourdough culture15gr

13%

Method for the preferment:

Dissolve the starter in the water. Add the flour and mix until well combined. Cover tightly with cling film and leave it to rest at room temperature for about 12 hours or as I said above: until it’s bubbly and floats.

seeded4

Ingredients for the bread:

IngredientQuantityBaker's %
Preferment240gr70.58%
Seeded White Organic340gr100%
Water 192gr56.50%
salt8gr

2.35%

Final baker’s percentage (including preferment):

IngredientQuantityBaker's %
Flour mix455gr100%
Water307gr67.47%
Sourdough15gr3.30%
Salt8gr1.75%

Seed mix: I bought a seed mix from Waitrose and used that one to seed the bread on the exterior. Not sure exactly how much I've used probably around 100gr.

Method for the bread

I dissolved the preferment in  the water and then added the flour. Mix until you have quite a weird and not smooth mass of wet flour coming together. Do NOT add the salt at this point. I covered the bowl and left it to rest for 30 minutes for the autolyse. When the 30 minutes are up add the salt and mix for around 3 minutes on low speed and another 2 minutes on medium speed. I use a Kitchen Aid with hook attachment for this. If you want to knead it by hand do it for about 10-15 minutes. Transfer the dough to a clean greased bowl (I used an oil spray to grease the bowl), cover it with cling film and leave it to rest for 50 minutes.I use shower caps for this ;).

seeded3

When the 50 minutes are up you are ready for your first stretch and fold.

I did my stretch and folds directly in the bowl, but you can either tip the dough onto a lightly floured surface or you can initially place your dough in a large rectangular container so you can do them directly in there.

Now cover the bowl again and leave to rest for another 50 minutes. Do another stretch and fold (the last one) and again leave to rest for 50 minutes.

After this final rest you need to preshape your bread. I preshaped it as a boule and left it to rest on my counter covered with a kitchen towel for 15 minutes. Then I shaped it as a batard. 

I've rolled the battard on a wet kitchen towel, to make sure the seeds will stick to it and then rolled one side (the smooth one) on a bed of seeds (I've just sprinkled the seeds generously on a different kitchen towel).

I then moved it in a floured banneton, seeds side down, placed it in a plastic bag that I closed tightly and left it to proof for 1hour and 50minutes. You can find here a clip on shaping and scoring a batard.

You will need your oven to reach 250C so start pre-heating sometime after the proofing period has started, depending on your oven.

To bake the bread I use a 3cm thick granite baking stone, that I've left in the oven for 2 hours at 250C, to heat up properly.

So, after 1 hour and 50minutes of proofing, I tipped my bread on a baking sheet scored it with a long score and put it in the oven.

seeded9

I also keep in the oven one of the trays, while it is pre-heating, so it gets hot hot. Then, immediately after transferring the bread on the stone, I add a cup of hot water to the tray below to create some steam and shut the door quickly.

Take the water tray out of the oven after first 20 minutes, otherwise the crust will not form properly.

You will need to bake this bread for 45 minutes at 230C. For me the baking was 5 minutes at 250C and then, because I have a really small oven, I reduced the temperature to 210C for the rest of the 45 minutes. To get a nice crust I've opened the oven door 5 minutes before the baking time is up, to release some of the steam and then left the bread in the oven for another 5 minutes oven turned off and door closed.

Resulting bread:

Amazing! Rich nutty flavour, a good crust improved by the crunchy seeds and a lovely buttery crumb.

Raluca's picture
Raluca

We haven’t talked about bread in a while, though I have been baking. Not as much as I would have liked, but I do have a couple of breads to tell you about.

Today is a lovely pain rustique that I’ve baked three times already and it’s just delicious, with a sweet perfumed crumb and a lovely caramelised crust. I think it’s one of our favourites, together with a white and semolina mix and a rye and caraway seeds one  . 

Time schedule:

Day 1: Make the preferment, leave for 12 hours at room temperature to mature. I don’t know exactly what the temperature in my kitchen is over night…I guess not above 21C.  I usually leave my preferment for around 12 hours until it’s nice and bubbly and has not sunk. You can test if it’s ready by putting a spoon of it in a bowl of water, if it floats it’s ready, otherwise it needs more time.

Day 2: Make the bread

    • Mix the preferment with the water and flour.
    • Leave to rest for 30mins (autolyse)
    • Add the salt and mix for 8 minutes on low speed
    • Leave to rest for 50mins
    • Perform 1st stretch and fold
    • Leave to rest for 50mins
    • Perform 2nd stretch and fold
    • Leave to rest for 50mins
    • Shape the bread
    • Proof it for 150mins
    • Bake at 250C for 5 minutes then reduce the oven temperature to 210C for another 40 minutes

Sourdough culture: I use a 100% hydration sourdough culture: 90% whole wheat, 10% dark rye. 

Recipe for 1 loaf (aprox. 78% hydration)

Flour: For this loaf I used very strong white Canadian flourorganic dark rye flour and organic light rye flour from the Shipton Mill.

Ingredients for the preferment

Make it 12 hours before you want to start on your bread.

IngredientQuantityBaker's %
Strong white flour35gr50%
Organic dark rye flour35gr50%
Water70gr100%
Sourdough culture15gr

21%

Method for the preferment

Dissolve the starter in the water. Add the flour and mix until well combined. Cover tightly with cling film and leave it to rest at room temperature for about 12 hours or as I said above: until it’s bubbly and floats. 

Ingredients for the bread

IngredientQuantityBaker's %
Preferment155gr41%
Strong white flour300gr80%
Light rye flour75gr20%
Water 275gr73%
Salt8gr

2%

Final baker’s percentage (including preferment)

IngredientQuantityBaker's %
Flour445gr100%
Water345gr77.52%
Sourdough culture15gr3.37%
Salt8gr1.80%

Method for the bread

I dissolved the preferment in about 2/3 of the water and then added it to the flour. Mix  until you have quite a weird and not smooth mass of wet flour coming together. Do NOT add the salt at this point.

I covered the bowl and left it to rest for 30 minutes for the autolyse.

When the 30 minutes are up add the salt and the 1/3 leftover water and mix for around 8 minutes on low speed. I used the Kitchen Aid with the hook attachment this time. If you want to knead it by hand do it for about 10-15 minutes.

Transfer the dough to a clean greased bowl (I used an oil spray to grease the bowl), cover it with cling film and leave it to rest for 50 minutes. I recently purchased some really cheap shower caps from Boots and I use those to cover my bowl with. Pretty handy as they’ve got elastic and everything  . 

When the 50 minutes are up you are ready for your first stretch and fold.

I did my stretch and folds directly in the bowl, but you can either tip the dough onto a lightly floured surface or you can initially place your dough in a large rectangular container so you can do them directly in there.

Now cover the bowl again and leave to rest for another 50 minutes. Do another stretch and fold (the last one) and again leave to rest for 50 minutes.

After this final rest you need to shape your bread. I shaped this one as a  batard. I moved it in a floured banneton, placed it in a plastic bag that I closed tightly and left it to proof for 2 hrs and 30 minutes. You can find here a clip on shaping and scoring a batard.

You will need your oven to reach 230C so start pre-heating sometime after the proofing period has started, depending on your oven.

To bake the bread I use a 3cm thick granite baking stone, that needs at least 1h20 minutes in a 250C oven to heat up properly.

So, after the 2hrs and 30 minutes of proofing, I tipped my bread on a baking sheet scored it with a long score and put it in the oven. 

I also keep in the oven one of the trays, while it is pre-heating, so it gets hot hot. Then, immediately after transferring the bread on the stone, I add a cup of hot water to the tray below to create some steam and shut the door quickly.

You will need to bake this bread for 45 minutes at 230C. To get a nice crust open the oven door 5 minutes before the baking time is up, to release some of the steam.

For me the baking was 5 minutes at 250C and then, because I have a really small oven, I reduced the temperature to 210C for the rest of the 45 minutes.

Resulting bread:

This is a very nice and tasty bread. It had a nice caramelised crust and a sweet perfumed crumb from the rye flour addition.

Raluca's picture
Raluca

I am back today, to tell you all about one of our favourite breads these days: Pain au Levain. I’ve baked this bread using one of Codruta‘s recipes and we loved it!

Time schedule:

Day 1: Make the preferment, leave for 8-12 hours at room temperature to mature. I don’t know exactly what the temperature in my kitchen is over night…I guess not above 21C.  I usually leave my preferment for around 12 hours until it’s nice and bubbly and has not sunk. You can test if it’s ready by putting a spoon of it in a bowl of water, if it floats it’s ready, otherwise it needs more time. This time I only left it for 11 hours.

Day 2: Make the bread

      • Mix the preferment with the water and flour.
      • Leave to rest for 45mins (autolyse) – The initial recipe calls for only 30mins, but I just couldn’t attend to it due to having some other stuff to do, so I’ve left it for 45minutes.
      • Add the salt and mix for 1 minute on speed 1 and another 3 minutes on speed 3.
      • Leave to rest for 50mins
      • Perform 1st stretch and fold
      • Leave to rest for 50mins
      • Perform 2nd stretch and fold
      • At this point we had to leave the house so I’ve put the dough in the fridge for 3 hours. The recipe called for another 50mins rest  and then the shaping, but I couldn’t do that. If you are at home, by all means don’t put it in the fridge just give it another 50mins rest after the 2nd stretch and fold and then pre-shape it.
      • I took the dough out of the fridge after the 3 hours, performed another stretch-fold and left it for another hour to come to room temperature. Skip this if you have done this the proper way with 3 – 50 mins rest sessions and 2 stretch and folds.
      • I shaped my bread in a batard shape and left it to proof in a floured banneton closed in a plastic bag for 2 hours 30 minutes.
      • Bake at 250C for 5 minutes then reduce the heat to 220C for another 35 minutes then bake for another 5 minutes with the oven door ajar. If you have a bigger oven you can try to bake it the proper way: 45 minutes in total at 230C with the last 5 minutes with the oven door open. 

Sourdough culture: I use a 100% hydration sourdough culture: 90% whole wheat, 10% dark rye.

Recipe for 1 loaf (aprox. 69% hydration)

Flour: For this loaf I used very strong Canadian white flour (that has 15% protein) and organic dark rye flour from Shipton Mill.

Ingredients for the preferment

Make it 12 hours before you want to start on your bread. The overall hydration of your preferment (including the water and flour in the sourdough culture is aprox. 60%). 

IngredientQuantityBaker’s %
Strong white flour53gr93%
Organic dark rye flour4gr7%
Water31gr54%
Sourdough culture14gr

24%

Method for the preferment

Dissolve the starter in the water. Add the flour and mix until well combined. Cover tightly with cling film and leave it to rest at room temperature for about 8-12 hours or as I said above: until it’s bubbly and floats. As I said I’ve left mine for 11 hours for this particular bread.

Ingredients for the bread

IngredientQuantityBaker’s %
Preferment102gr29%
Strong white flour333gr95%
Organic dark rye flour17gr5%
Water240gr69%
Salt8gr2%

Final baker’s percentage (including preferment)

IngredientQuantityBaker’s %
Flour407gr100%
Water271gr66.58%
Sourdough culture14gr3.47%
Salt8gr1.96%

Method for the bread

I dissolved the preferment in about 2/3 of the water and then added it to the flour. Mix and add the rest of the water until you have quite a weird and not smooth mass of wet flour coming together. Do NOT add the salt at this point.

I covered the bowl and left to rest for 45 minutes for the autolyse. As I said the original recipe calls for only 30minutes of autolyse..but I couldn’t get to it until after 45minutes. Still works.

When the 45 minutes were up I added the salt. I used the Kitchen Aid with the hook attachment this time: 1 minute on speed 1 and another 3 on speed 2. If you want to knead it by hand do it for about 10 minutes or so.

Transfer the dough to a clean greased bowl (I used an oil spray to grease the bowl), cover it with cling film and leave it to rest for 50 minutes. 

When the 50 minutes are up you are ready for your first stretch and fold.

I did my stretch and folds directly in the bowl, but you can either tip the dough onto a lightly floured surface or you can initially place your dough in a large rectangular container so you can do them directly in there.

Now cover the bowl again and leave to rest for another 50 minutes. Do another stretch and fold (the last one) and again leave to rest for 50 minutes. I couldn’t do that, as we had to go out so I’ve put my dough in the fridge for 3 hours. When we returned I took it out, performed another stretch and fold and left it to come to room temperature for another hour.

After this final rest you need to shape your bread. I shaped this one as a batard, not a great one, but getting there. I moved my shaped loaf in a floured banneton, placed it in a plastic bag that I closed tightly and left it to proof for 2 hrs and 30 minutes.

You will need your oven to reach 230C so start pre-heating sometime after the proofing period has started, depending on your oven.

To bake the bread I use a 3cm thick granite baking stone, that needs at least 1h20 minutes in a 250C oven to heat up properly.

So, after the 2hrs and 30 minutes of proofing, I tipped my bread on a baking sheet scored it with one good score and another 3 rubbish ones, but hey I am learning and put it in the oven. 

I also keep in the oven one of the trays, while it is pre-heating, so it gets hot hot. Then, immediately after transferring the bread on the stone, I add a cup of hot water to the tray below to create some steam and shut the door quickly.

You will need to bake this bread for 45 minutes at 230C. To get a nice crust open the oven door 5 minutes before the baking time is up, to release some of the steam. In my case as the oven is very small I baked it for 5 minutes at 250C then reduced the temperature to 220C for the next 35 minutes and kept it with the oven door opened for another 5 minutes.

Resulting bread:

This is now one of our favourite breads. It had a nice crust with a bit of crunch and the crumb was sweet and with a very nice chewy texture.

Raluca's picture
Raluca

I have baked a bread once every two days, so I’ve got solo many things to tell you, but the day is just not long enough.

Need to spend it with our wonderful 7 months old daughter, as well as baking bread, cooking some food and working on some exciting things that involve yarn and crochet, but more on that at the right time.

Today I want to tell you all about my first attempt at baking a whole wheat sourdough bread, well it’s not entirely whole wheat just 65% whole wheat, but your know what? We loved it like that and that’s why I want to share it with you.

I have used a recipe from the Weekend Bakery for this bread as well and I really need to thanks Marieke and Ed for posting about it and answering all the questions and comments they receive! Their website it’s simply a treasure  . 

Time schedule:

Day 1: Make the preferment leave for 12 hours at room temperature to mature. I don’t know exactly what the temperature in my kitchen is over night…I guess not above 21C.  I usually leave my preferment for around 12 hours until it’s nice and bubbly and has not sunk. You can test if it’s ready by putting a spoon of it in a bowl of water if it floats it’s ready  .

Day 2: Make the bread

    • Mix the preferment with the water and flour.
    • Leave to rest for 20mins (autolyse)
    • Add the salt and mix for 6 minutes on low speed
    • Leave to rest for 50mins
    • Perform 1st stretch and fold
    • Leave to rest for 50mins
    • Perform 2nd stretch and fold
    • Leave to rest for 50mins
    • Shape the bread
    • Proof it for 150mins
    • Bake at 230C for 48mins

Sourdough culture: I use a 100% hydration sourdough culture: 90% whole wheat, 10% dark rye. 

Recipe for 1 loaf (aprox. 69% hydration)

Flour: For this loaf I used strong white organic flour from Shipton Mill and organic whole wheat flour from the same mill.

Ingredients for the preferment

Make it 12 hours before you want to start on your bread.

IngredientQuantityBaker’s %
Organic whole wheat flour65gr100%
Water65gr100%
Sourdough starter15gr23%

Method for the preferment

Dissolve the starter in the water, this is what I start with always. Add the flour and mix until well combined. Cover tightly with cling film and leave it to rest at room temperature for about 12 hours or as I said above: until it’s bubbly and floats. 

Ingredients for the bread

IngredientQuantityBaker’s %
Preferment145gr38%
Organic whole wheat flour225gr58%
Organic strong white flour160gr42%
Water250gr65%
Salt8gr2%

Final baker’s percentage (including preferment)

IngredientQuantityBaker’s %
Flour450gr100%
Water310gr68.88%
Sourdough culture15gr3.33%
Salt8gr1.77%

Method for the bread

I dissolved the preferment in about 2/3 of the water and then added it to the flour. Mix and add the rest of the water until you have quite a weird and not smooth mass of wet flour coming together. Do NOT add the salt at this point.

I covered the bowl and left to rest for 30 minutes for the autolyse.

When the 30 minutes are up I add the salt and mix for around 6 minutes on low speed. I used the Kitchen Aid with the hook attachment this time. If you want to knead it by hand do it for about 10-15 minutes.

Transfer the dough to a clean greased bowl (I used an oil spray to grease the bowl), cover it with cling film and leave it to rest for 50 minutes. 

When the 50 minutes are up you are ready for your first stretch and fold. If you are not familiar with this technique watch this video from the Weekend Bakery, that I find really useful.

I did my stretch and folds directly in the bowl, but you can either tip the dough onto a lightly floured surface or you can initially place your dough in a large rectangular container so you can do them directly in there.

Now cover the bowl again and leave to rest for another 50 minutes. Do another stretch and fold (the last one) and again leave to rest for 50 minutes.

After this final rest you need to shape your bread. I shaped this one as a boule again. I moved my shaped boule in a floured banneton, placed it in a plastic bag that I closed tightly and left it to proof for 2 hrs and 30 minutes.

You will need your oven to reach 230C so start pre-heating sometime after the proofing period has started, depending on your oven.

To bake the bread I use a 3cm thick granite baking stone, that needs at least 1h20 minutes in a 250C oven to heat up properly.

So, after the 2hrs and 30 minutes of proofing, I tipped my bread on a baking sheet scored it with a cross and put it in the oven.

I also keep in the oven one of the trays, while it is pre-heating, so it gets hot hot. Then, immediately after transferring the bread on the stone, I add a cup of hot water to the tray below to create some steam and shut the door quickly.


I baked this bread at 230C for 45 minutes. To get a nice crust open the oven door 5 minutes before the baking time is up, to release some of the steam. If your oven is as small as mine you will need to reduce the heat to about 215C, I think, after about 10 minutes otherwise the top of your bread will be burnt. I did it but a bit too late and you can see some of my “ear” got burnt  .

Resulting bread:

This is a very nice and tasty bread. It had a nice crust and crumb and very was very nutty and tasty, especially with butter. Alex enjoyed it very much toasted with butter and orange marmalade as well  .

Raluca's picture
Raluca

 A couple of days ago I told you about my first white sourdough baked this year.

Today I am going to tell you about the second one. Still not perfect, but definitely improved. Baked all the way through, with a good oven spring due to preheating the oven and stone for much longer (1hr and 20 minutes to be exact) and a better crumb (potentially from the increased hydration – I went for a 67% hydration level for this one, compared to almost 65% for the first one).

I followed pretty much the same recipe and method as for the first boule, the only difference for the recipe was in the hydration level of the final dough.

So you still have the same time schedule, the same ingredients for the preferment and the same baker’s percentage for the preferment.

Here are the ingredients for the final bread and the baker’s percentages for this new formula.

Recipe for 1 loaf (67% hydration)

Ingredients for bread

Ingredient     Quantity   Baker's %
Preferment245gr72%
Strong white flour340gr100%
Water192gr56%
Salt8gr

2.30%

Final baker’s percentage (including preferment)

Ingredient  Quantity    Baker’s     %
Strong white flour455gr100%
Water307gr67.47%
Sourdough culture15gr3.29%
Salt8gr1.75%

For this bread I used the same strong organic white flour from Shipton Mill.

Method:

The method I used was the same, apart from pre-heating the oven and baking stone for 1h and 20 minutes rather than just 20 minutes.

The results are just amazing! When a loaf like this comes out of my oven I just wonder why I have ever bought bread from a shop, why? Why?

This time the bottom wasn’t cracked anymore, the bread was baked all the way through and the crumble was much better. As for the taste: divine!

What do you think? Better?

Raluca's picture
Raluca

I haven’t started with my first breads as there isn’t much to tell you, so I am starting with the breads I baked this year.

First I started by cultivating my own sourdough starter. It is now a 100% hydration starter with a mix of 90% whole wheat flour and 10% dark rye flour.

I will try to write a different post on how I made the starter soon and to explain all the terms, utensils and about the baker’s percentage.

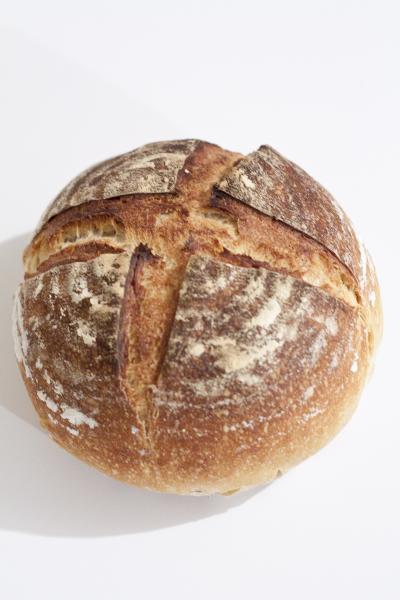
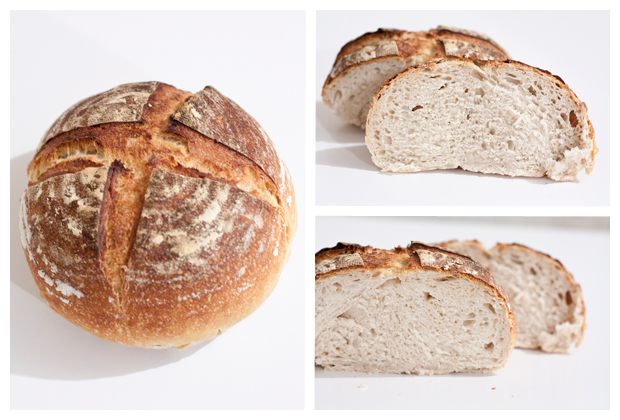
Today let’s just talk about the bread above, which let me tell you from the start, it’s not a success (I’ll tell you why, of course).

For this recipe I used a recipe for a white sourdough bread from the Weekend Bakery.
Time schedule:

Day 1: Make the preferment leave for 12 hours at room temperature to mature

Day 2: Make the bread

  • Mix the preferment with the water and flour.
  • Leave to rest for 20mins (autolyse)
  • Add the salt and mix for 4 minutes
  • Leave to rest for 50mins
  • Perform 1st stretch and fold
  • Leave to rest for 50mins
  • Perform 2nd stretch and fold
  • Leave to rest for 50mins
  • Shape the bread
  • Proof it for 150mins
  • Bake at 230C for 45mins


Recipe for 1 loaf (aprox 65% hydration)

Ingredients for the preferment

For this bread a preferment is needed.

IngredientQuantityBaker’s %
Strong white wheat flour115gr100%
Water115gr100%
Sourdough culture15gr10%

Method

Dissolve the sourdough culture with warm water (you shouldn’t feel the water when dipping your hand in) and add the flour. Mix until all the flour is wet. Cover with kitchen foil and leave at room temperature for 12 hours.

Ingredients for the bread

IngredientQuantityBaker’s %
Preferment245gr72%
Strong white flour340gr100%
Water180gr53%
Salt8gr2.30%

Final baker’s percentage (including preferment)

IngredientQuantityBaker’s %
Strong white flour455gr100%
Water295gr64.83%
Sourdough culture15gr3.29%
Salt8gr1.75%

For this bread I used an organic strong white wheat flour from a traditional British mill Shipton Mill.

Method for the bread

I dissolved the preferment in about 2/3 of the water and then added it to the flour. Mix and add the rest of the water until you have quite a weird and not smooth mass of wet flour coming together. Do NOT add the salt at this point.

I covered the bowl and left to rest for 30 minutes for the autolyse. The recipe calls for 20 minutes autolyse, but I couldn’t get around to the next stage after 20 minutes, as I was busy around the house. Anyway I don’t think it’s anything bad with a longer autolyse.

When the 20 minutes are up add the salt and mix for around 4 minutes. I use a Kitchen Aid with a hook attachment usually, but this bread in particular I kneaded by hand as the lil’ one was asleep and I didn’t want to risk waking her with the Kitchen Aid noise. I think I probably should have kneaded longer by hand, but I only did it for about 4 minutes.

Baker’s tip: use fine salt as it will be easier to incorporate it in your dough.
Transfer the dough to a clean greased bowl (I used an oil spray to grease the bowl), cover it with cling film and leave it to rest for 50 minutes.

When the 50 minutes are up you are ready for your first stretch and fold. If you are not familiar with this technique watch this video from the Weekend Bakery, that I find really useful.

I did my stretch and folds directly in the bowl, but you can either tip the dough onto a lightly floured surface or you can initially place your dough in a large rectangular container so you can do them directly in there.

Now cover the bowl again and leave to rest for another 50 minutes. Do another stretch and fold (the last one) and again leave to rest for 50 minutes.

It may seem like a lot of work, but it’s not really a massive amount of active work, you just need to have the time to take care of your bread. And let me tell you with this cold weather in London I had some time to bake  .

After this final rest you need to shape your bread. Now shaping and scoring are still a mystery to me.. You can find loads of clips on shaping and scoring online. I shaped my white sourdough as a boule, here is a clip from the Weekend bakery on boule shaping. You can find another clip on both shaping and scoring of a boule here.

For this particular bread I did a very bad job at shaping and therefore the bottom came out with a massive number of cracks….The scoring though was not so bad. To score the bread I use this bread scoring tool.

I use bannetons to proof my bread, so I moved my shaped boule in a floured banneton, covered it with a tea towel and left it to proof for 2 hrs and 30 minutes.

You will need your oven to reach 230C so start pre-heating sometime after the proofing period has started, depending on your oven.

To bake the bread I use a 3cm thick granite baking stone, that needs at least 1h20 minutes in a 250C oven to heat up properly. However for this first time I only pre-heated my oven and stone at 230C for about 20 minutes, which was clearly not enough, as my bread was white on the bottom when it came out of the oven, cracked and undercooked.

So, after the 2hrs and 30 minutes of proofing, I tipped my bread on a baking sheet (that I use to transfer the bread to the oven..as I don’t have a peel yet) scored it with a cross and put it in the oven.

I also keep in the oven one of the trays, while it is pre-heating, so it gets hot hot. Then, immediately after transferring the bread on the stone, I add a cup of hot water to the tray below to create some steam and shut the door quickly.

I baked this bread at 230C for 45 minutes. To get a nice crust open the oven door 5 minutes before the baking time is up, to release some of the steam.

I didn’t need to reduce the temperature of the oven this time, because the pre-heating period was short, but usually I need to do it as my oven is really small and burns the top of my loaves.
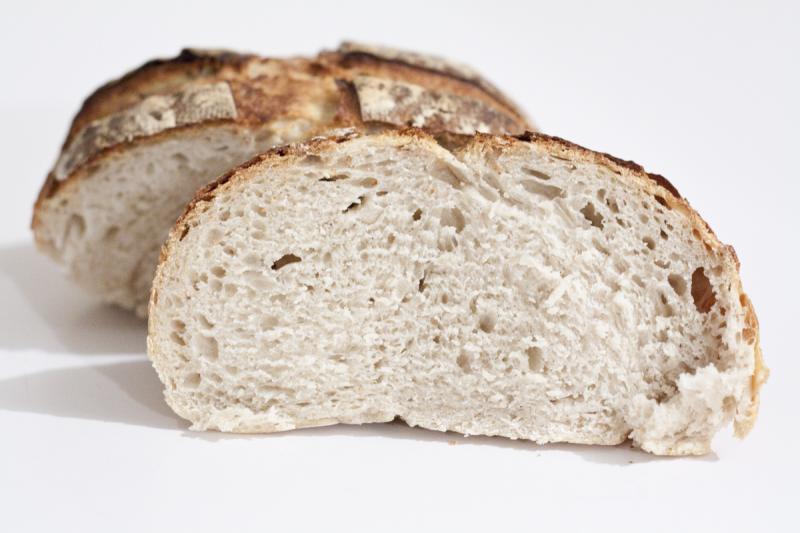
Resulting bread:

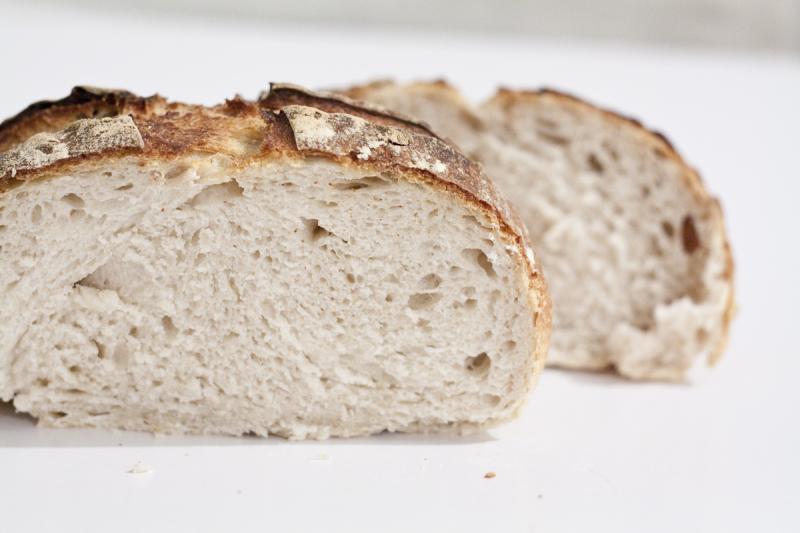
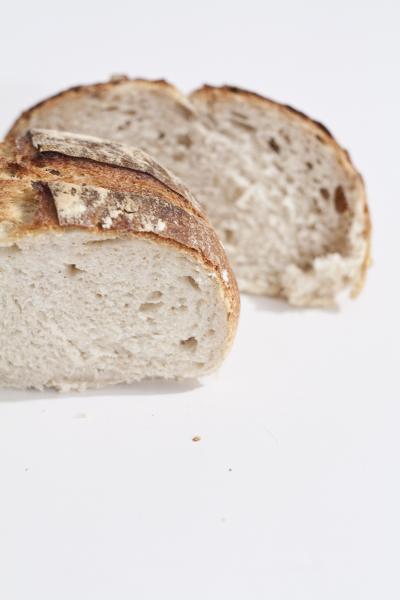
Because of the bad shaping and the short pre-heating time the bread came out with a very cracked bottom. Also, as the baking stone was not hot, it came out white on the bottom and undercooked. It was also a bit too dense (not sure exactly why..as it could be a lot of reasons..still learning), but smelled nice, had a lovely crust on top and was very tasty.

What do you guys think? Any comments welcome!

Subscribe to RSS - Raluca's blog